Welcome to our comprehensive guide on how to lay paving slabs on grass, an easy and rewarding DIY project that can instantly transform your outdoor space. Whether you’re looking to create a stylish garden path, a new patio, or a cozy corner for relaxation, this step-by-step guide will help you achieve professional-looking results without the need for expert skills. We’ll walk you through the entire process, from selecting materials and preparing your lawn to laying the slabs and finishing the job. By the end of this guide, you’ll have a solid, beautiful surface that enhances both the functionality and aesthetic of your garden. Let’s get started!
To lay paving slabs on grass, start by clearing the area of any grass or debris, then dig the ground to a suitable depth. Add a layer of hardcore followed by sand, leveling the surface as you go. Lay each paving slab evenly, using a spirit level for accuracy, and tap them into place with a rubber mallet. Finally, fill the gaps between the slabs with jointing compound or sand to secure them. Proper ground preparation and leveling are key for a stable, long-lasting surface.
- Materials And Tools You'll Need
- Planning And Preparation
- How To Prepare The Ground
- Laying The Base (Sand And Hardcore Layer)
- How To Lay The Paving Slabs
- Filling The Joints Between The Slabs
- Final Steps And Clean-Up
- Common Mistakes To Avoid
- Maintenance Tips For Your New Patio Or Path
- When To Call A Professional
- FAQs: About How To Lay Paving Slabs On Grass
- Can I lay paving slabs directly on grass?
- Do I need to remove all the grass before laying paving slabs?
- How deep should I dig when preparing the ground?
- What type of sand should I use under paving slabs?
- How do I ensure the slabs are level?
- Do I need a weed membrane under the slabs?
- How far apart should paving slabs be spaced?
- How long does it take for the jointing compound to set?
- Can I lay paving slabs on an uneven surface?
- How can I prevent the paving slabs from sinking over time?
- Conclusion
Materials And Tools You’ll Need
Gather Your Materials
Before you begin laying paving slabs on grass, it’s essential to have all the necessary materials and tools ready. Not only does this save time, but it also ensures that the process runs smoothly without any interruptions. Here’s a detailed breakdown of what you’ll need and why each item is important for a successful project.
Paving slabs
The primary component of your project, paving slabs come in various materials, shapes, and sizes. Whether you’re looking for concrete, sandstone, or granite slabs, your choice will depend on your aesthetic preferences and the slab’s durability. They form the surface of your new paved area and must be selected to fit the purpose—whether it’s a patio, pathway, or garden feature.
Sand
Sand plays a critical role in creating a smooth, level surface for your paving slabs. It is used to fill gaps between slabs and helps to stabilize them in place. When compacted, sand provides a solid base and ensures your slabs stay level over time. Make sure you use sharp sand for a more stable foundation rather than soft sand, which may shift and cause slabs to move.
Hardcore (gravel or crushed stone)
This layer is essential for drainage and stability. Hardcore, such as gravel or crushed stone, helps prevent water from pooling under your paving slabs, which can cause sinking and unevenness. A sturdy base of hardcore ensures that your paved surface will remain stable even after heavy use or adverse weather conditions.
Weed membrane
To avoid weeds growing through the gaps in your slabs, a weed membrane is crucial. It acts as a barrier that allows water to drain but prevents weeds from taking root beneath your paving. This will save you maintenance time and keep your paved area looking clean and tidy for longer.
Jointing compound (if needed)
For a more polished finish, jointing compound can be used between the gaps in your paving slabs. This helps prevent movement and keeps everything securely in place. Depending on the look you’re after, you can choose from different compounds that harden or remain flexible, ensuring durability and longevity for your paved area.
Wooden stakes and string
These tools are used to mark out your work area. Wooden stakes, driven into the ground, and string lines give you a visual guide to ensure that your slabs are laid in straight lines and follow your planned design. Without this step, it’s easy to end up with uneven or crooked paving.
Spirit level
A spirit level is vital for achieving a perfectly flat and even surface. As you lay each slab, you’ll use the spirit level to make sure it is aligned correctly. Uneven slabs not only look unattractive but can also cause drainage issues or pose tripping hazards. Ensuring everything is level as you go will save you time correcting mistakes later on.
Shovel and rake
You’ll need a shovel and rake to prepare the ground and spread the layers of sand and hardcore evenly. These tools help you clear the area of any debris and create a smooth surface for laying your paving slabs. A rake, in particular, is useful for evenly distributing materials, ensuring an even base.
Rubber mallet
Unlike a regular hammer, a rubber mallet is perfect for gently tapping your paving slabs into place without damaging them. As you position each slab, you’ll use the mallet to ensure it sits firmly on the base while maintaining its integrity. The rubber surface prevents chips, cracks, or other damage to the slabs.
Trowel
A trowel is handy for smaller, detailed tasks such as applying jointing compound or adjusting the positioning of slabs. It’s a versatile tool that can help you smooth sand or create precise edges where needed, ensuring a neat and professional finish.
By gathering all these materials and tools, you’ll be well-equipped to lay your paving slabs on grass efficiently and effectively. Not only will your project be more straightforward, but your finished product will look polished, professional, and durable for years to come.
Planning And Preparation
Plan Before You Start
Before jumping into the physical work of laying paving slabs on your lawn, thoughtful planning and preparation are crucial to ensure a smooth, successful project. A well-laid path or patio doesn’t just enhance the look of your garden—it also improves its functionality, durability, and ease of maintenance. Below, we’ll break down key factors like site selection, marking the area, and calculating the number of slabs you’ll need.
Site Selection: Choosing the Perfect Spot
One of the first steps in planning your paving slab project is choosing the best location in your garden. This decision can affect not only how your paving looks but also how long it lasts and how practical it is. To choose the ideal spot, consider the following factors:
- Foot Traffic: If your paving slabs will be part of a garden pathway or patio, think about where you and others typically walk. Selecting high-traffic areas helps ensure that your slabs serve a practical purpose and aren’t just decorative. For instance, placing a pathway from your back door to a garden shed or seating area can increase both convenience and accessibility.
- Drainage: Good drainage is critical for any outdoor paving project. Avoid low-lying areas where water tends to pool after rain, as standing water can weaken the foundation beneath your paving slabs over time. Look for areas that naturally slope or can easily be graded to allow for proper water runoff. Proper drainage will keep your slabs in good condition for years and prevent unsightly puddles from forming on your garden path or patio.
- Sunlight Exposure: If your paving is intended as a seating area, consider how much sunlight the area receives throughout the day. A spot that gets too much direct sunlight may become unbearably hot in summer, while a shaded area may be more pleasant for relaxation. On the other hand, excessive shade can encourage moss or algae growth on your slabs, making them slippery and unsafe, so balance is key.
Marking the Area: Measuring and Planning the Layout
Once you’ve chosen the best location for your paving project, the next step is to accurately measure and mark the area. This ensures you’ll have a clear guide to work from and helps avoid any mistakes during the laying process. Here’s how to get started:
- Measure the Space: Use a tape measure to determine the exact dimensions of the area where you want to lay the paving slabs. Measure both the length and width, noting down these measurements so you can use them later for calculations. It’s essential to ensure the area is large enough for the slabs to fit without overcrowding or leaving excessive gaps.
- Mark the Perimeter: Once you’ve measured, mark the perimeter of the area using wooden stakes and string. Start by driving the wooden stakes into the ground at each corner of your planned paving area. Afterward, run the string between the stakes to outline the area. This will give you a clear visual guide and ensure that your paving slabs will be laid in straight, even lines.
- Check for Even Spacing: As you set up your perimeter, take the time to ensure your lines are straight and your measurements are accurate. A crooked or uneven layout will be noticeable once the slabs are laid and can be difficult to correct. If necessary, use a spirit level or builder’s line to check for any unevenness in the ground, as this can affect the final result.
Calculate the Number of Slabs Needed
Now that your area is marked and ready, it’s time to figure out how many paving slabs you’ll need. Calculating the right number of slabs is crucial for avoiding shortages or excess, both of which can be costly and time-consuming. Here’s a simple method to calculate:
1. Determine the Area Size: Using the measurements you took earlier, calculate the total area of the space. Multiply the length by the width to find the square footage (or square meters, depending on your unit of measurement). For example, if your garden path is 10 meters long and 2 meters wide, the total area is 20 square meters.
2. Check the Size of Each Slab: Paving slabs come in various sizes, so check the exact dimensions of the slabs you plan to use. For instance, a standard paving slab might measure 600mm x 600mm. Calculate the area of each slab by multiplying the length by the width. In this example, one slab would cover 0.36 square meters.
3. Divide and Round Up: To calculate how many slabs you’ll need, divide the total area of your site by the area of one slab. Using the example above, if your total area is 20 square meters and one slab covers 0.36 square meters, you’ll need about 56 slabs (20 ÷ 0.36 = 55.56). Always round up to the nearest whole number, as it’s better to have a few extra slabs than not enough.
4. Allow for Breakages and Mistakes: It’s wise to order a few extra slabs beyond your initial calculation. This provides a buffer in case of breakages, mistakes during installation, or any future repairs you might need to make. Ordering 5-10% more slabs than your calculated total should cover these scenarios.
By carefully planning your site, marking it accurately, and calculating the correct number of slabs, you’ll set yourself up for a smooth paving project with fewer headaches along the way.
How To Prepare The Ground
When you’re about to lay paving slabs, preparing the ground is a crucial first step that sets the foundation for a smooth and durable surface. Skipping or rushing this part of the process can lead to uneven slabs, drainage issues, and long-term problems like weed growth. By properly preparing the area, you’re ensuring that your slabs will stay level and in place for years to come. Let’s break down the steps to get your ground ready for laying paving slabs.
Clearing the Area
The first task is to clear the area where you’ll be laying your paving slabs. This involves removing any existing grass, roots, plants, or debris from the site. Grass and roots, if left in place, can rot or shift over time, causing your paving slabs to move or sink. You want a clean, stable base to work on.
To start, mark out the area where the slabs will be placed using stakes and string to ensure you’re working within the designated space. Then, use a spade or garden fork to dig up any grass or plants. Make sure to dig deep enough to get the roots as well, as these can cause issues down the line if left unchecked. Once the surface is clear, rake the area to remove any small stones or leftover debris. The goal is a flat, even surface that will allow you to work efficiently in the next steps.
Excavating the Ground
Once you’ve cleared the area, it’s time to excavate the ground to the proper depth. This is where precision becomes key. The depth of your excavation will depend on the materials you’re using: typically, you’ll need enough space for a layer of gravel or hardcore, followed by a layer of sand, and finally, the slabs themselves. A general guideline is to dig the ground to a depth of about 100-150mm (4-6 inches), depending on the thickness of your slabs and the layers beneath them.
Start by digging around the perimeter of the marked-out area and then work your way inward. Use a shovel or spade to ensure the depth is consistent across the entire space. Once you’ve excavated to the desired depth, compact the soil using a tamper or plate compactor to create a firm base. Compacting the soil is important because it reduces the chance of settling later, which could cause the slabs to shift or become uneven.
Laying the Weed Membrane
Weed growth can be a significant issue if you don’t take the proper precautions. Even small gaps between your slabs can allow weeds to creep through, disrupting the look and functionality of your paved area. To prevent this, it’s essential to lay a weed membrane before adding any gravel or sand. Weed membranes are breathable fabrics that block weed growth while allowing water to drain through, helping maintain the durability of your paving surface.
To install the weed membrane, roll it out across the entire surface of your excavated area. Cut it to size, ensuring it covers every inch of the ground. Make sure the edges of the membrane slightly overlap, especially if you’re covering a large area. Secure the membrane in place by weighing it down with stones or temporary stakes until you’re ready to add the next layer.
With the weed membrane in place, you now have a solid, protected foundation to continue the process of laying your paving slabs. This extra step may take a bit more time, but it’s a small investment that can save you a lot of effort in weed control and maintenance down the line.
By following these preparation steps—clearing, excavating, and laying a weed membrane—you’re setting up your paving project for success. Proper preparation ensures your slabs will sit evenly and securely, creating a beautiful, long-lasting paved surface that enhances your outdoor space.
Laying The Base (Sand And Hardcore Layer)
When laying paving slabs on grass, creating a stable and durable foundation is crucial for the long-term success of your project. The foundation typically consists of two layers: a hardcore layer and a sand layer. These materials work together to prevent the paving slabs from shifting, sinking, or becoming uneven over time. Proper installation of these layers ensures that your paved area remains intact and functional, even with frequent use.
Creating a Stable Base
A stable base is essential to support the weight of both the paving slabs and any future traffic—whether foot traffic or garden furniture—on top of them. Without a properly laid base, your paving slabs may become uneven or damaged due to settling or weather conditions. Here’s how to lay the foundation effectively.
Laying Hardcore
The hardcore layer acts as the foundation’s structural backbone. Hardcore is usually made up of crushed stone or gravel, and it serves to provide a firm, well-draining base that prevents shifting. This layer is particularly important for drainage, allowing water to move freely beneath the surface and reducing the risk of pooling or erosion.
Start by spreading the hardcore evenly over the entire area where you plan to lay the paving slabs. The depth of the hardcore layer should generally be around 50-100mm, depending on the type of soil you’re working with. Softer ground may require a thicker hardcore layer for added stability. Once you’ve spread the hardcore, use a rake or shovel to distribute the material as evenly as possible across the surface. Uneven distribution can cause weak spots that may later result in sagging or movement.
Compacting the Hardcore Layer
After the hardcore layer is in place, it’s important to compact it thoroughly to create a solid base. You can use a tamper or a compacting tool for this job. Compacting ensures that the hardcore is tightly packed, eliminating air pockets that could cause instability over time. Begin at one corner of the area and systematically work your way across the entire surface, applying even pressure to compact the hardcore. The goal is to create a dense, level base that will provide a sturdy foundation for the sand layer that follows.
Laying the Sand
The final layer in the base is sand, which provides a smooth, even surface for laying the paving slabs. The sand helps to level out any minor imperfections in the hardcore layer and also aids in creating a stable surface that absorbs pressure and weight. Use sharp sand rather than fine sand, as it has larger grains that pack together more securely, providing better stability.
Once you’ve placed the sand, spread it evenly using a rake, making sure it covers the entire area. You should aim for a sand layer that’s about 20-30mm thick. After the sand is evenly spread, use a straightedge, such as a piece of wood or a long spirit level, to level the surface. Move the straightedge across the sand in smooth, controlled motions to ensure that the surface is flat and consistent. If necessary, add more sand to any low spots and repeat the leveling process.
A well-leveled sand layer is essential for the proper placement of paving slabs. Uneven or improperly leveled sand can lead to wobbly slabs and an unattractive finish. Take your time to ensure the sand layer is as smooth and even as possible before moving on to the next step of laying the paving slabs.
By carefully following these steps—laying the hardcore, compacting it, and spreading the sand evenly—you’ll create a solid and durable base that will support your paving slabs for years to come. This foundation work may seem time-consuming, but it will pay off in the long term by ensuring the structural integrity and aesthetic appeal of your paved area.
How To Lay The Paving Slabs
Laying paving slabs is one of the most important steps in transforming your outdoor space. Doing it right ensures a long-lasting, sturdy patio or walkway. The process might seem daunting at first, but following a clear, step-by-step guide will make things manageable. Here’s how to lay the paving slabs properly:
Placing the Slabs
When you begin laying the paving slabs, start from a corner or the edge of your designated area. This gives you a solid reference point and keeps everything aligned as you work your way out. Place the first slab carefully onto the prepared sand or mortar bed. Take your time with this first slab because it sets the tone for the rest of your project. Position it gently but with intention, making sure the edges align with your starting point. Lay the slabs one at a time, checking their placement before moving on to the next one.
This first step is crucial because misaligned slabs will result in uneven surfaces and gaps that can become problematic over time. Rushing this process will only lead to mistakes, so ensure that each slab is placed with care, paying close attention to its position relative to the surrounding slabs.
Spacing and Alignment
Achieving uniform spacing between your paving slabs will give your patio or path a clean, professional look. A common mistake people make is eyeballing the gaps between slabs, but this can lead to inconsistent spacing. To avoid this, use spacers or a small trowel to measure the gaps. Typically, a gap of about 1-1.5 cm between slabs works well, but this can vary depending on the look you’re going for and the type of slabs you’re using.
As you continue laying slabs, check both the spacing and alignment regularly. Stand back every few slabs to make sure the pattern is forming evenly. You can make minor adjustments as you go, but keeping things aligned early on will save you time and hassle in the long run.
Using a Spirit Level
Ensuring that each slab is level is critical for both the aesthetics and functionality of your surface. A spirit level will help you achieve this. After placing a slab, lay the spirit level across its surface. If the bubble is centered, you’re good to go. If not, you’ll need to adjust the slab by either adding or removing sand from beneath it.
Sometimes, the natural terrain can make it tricky to get slabs perfectly level, especially if you’re working on a slight incline. In these cases, aim for consistency. Your slabs should all follow the same gradual slope if you’re accounting for drainage. Otherwise, level each slab individually. Don’t be afraid to make adjustments; it’s better to take a few extra minutes here than to end up with an uneven surface that collects water or feels uncomfortable underfoot.
Tapping the Slabs into Place
Once you’re satisfied with the placement and level of a slab, use a rubber mallet to gently tap it into place. This helps to secure the slab into the underlying sand or mortar, ensuring it sits snugly. Be sure to use a rubber mallet rather than a regular hammer, as a hammer could crack or chip the slabs.
Tap around the edges of the slab as well as in the center, applying even pressure to ensure the slab settles into place uniformly. Don’t overdo it, though—a gentle but firm tap is all that’s needed to get the slab set properly. Once tapped down, check again with the spirit level to make sure the slab hasn’t shifted or settled unevenly.
By following these steps—starting from the corner, ensuring proper spacing and alignment, using a spirit level to maintain evenness, and gently tapping the slabs into place—you’ll end up with a beautifully laid surface. This process requires patience and attention to detail, but the result will be worth it: a durable and visually appealing outdoor space that will stand the test of time.
Filling The Joints Between The Slabs
Once your paving slabs are in place, one crucial final step is filling the joints between them. This process not only enhances the aesthetic of your patio or pathway but also plays a key role in the durability and stability of the installation. Here’s a comprehensive look at why jointing matters and how to go about it.
Why Jointing is Important
Jointing is essential for several reasons. Firstly, it secures the slabs, preventing movement that could lead to an uneven surface over time. Without proper jointing, even a small amount of shifting can cause cracks or misalignment, which could eventually damage the entire layout. Jointing also helps lock the slabs together, providing structural integrity to the paved area.
Additionally, filling the joints between the slabs minimizes the growth of weeds and grass. Open spaces between the slabs are a breeding ground for unwanted plants, and over time, their roots can disrupt the foundation of your paving. Proper jointing also allows for better water drainage, preventing puddles from forming, which could otherwise lead to frost damage in colder climates. Overall, jointing is a crucial step to ensure that your paving project stands the test of time.
Applying Jointing Compound
The first step in filling the joints between your slabs is choosing the right jointing material. For most DIY projects, you’ll either use a jointing compound or dry sand, depending on the look you’re going for and the type of slabs you’ve laid. Jointing compounds are generally pre-mixed and come in various colors to match your paving. These compounds are easy to use, harden over time, and are weather-resistant. On the other hand, dry sand is a traditional and cost-effective option that can be used for smaller or more informal projects.
Here’s a step-by-step guide for applying a jointing compound:
1. Clean the Surface: Before applying any jointing material, ensure the gaps between the slabs are clear of debris, dirt, or loose materials. A clean surface will ensure that the compound settles properly into the joints.
2. Wet the Area: Dampen the surface of the slabs and the joints. This will prevent the jointing compound from sticking to the slabs, making it easier to apply. However, be careful not to oversaturate the area, as this can make it difficult for the compound to settle.
3. Apply the Compound: Spread the jointing compound over the surface, focusing on the joints. Using a trowel or a spade, work the compound into the gaps, ensuring it’s packed in tightly. It’s essential to apply even pressure to avoid air pockets, which can weaken the joint.
4. Remove Excess Compound: Once the gaps are filled, use a soft brush or broom to sweep away the excess compound from the surface. This step ensures the compound is evenly distributed, and the slabs maintain a clean, polished look.
Brushing in the Compound
Brushing in the jointing compound is the final step to achieving a professional finish. Here’s how to do it effectively:
1. Use a Soft Broom: Gently sweep the jointing compound into the joints using a soft broom. A broom with stiff bristles could scratch or displace the slabs, so it’s best to use something more delicate. Sweep in different directions to ensure the compound fills the joints completely.
2. Compact the Compound: As you brush the compound into the joints, use the broom to lightly compact the material. This ensures the joints are filled properly and reduces the chances of any future gaps forming. If needed, use a pointed tool to press the compound into tighter gaps.
3. Final Cleaning: After brushing the compound into the joints, do a final sweep to remove any remaining material from the surface of the slabs. You want a clean, even finish without leftover residue, which can harden and be difficult to remove later.
4. Allow Time to Set: Depending on the type of jointing compound you’re using, it may need time to cure. Be sure to follow the manufacturer’s instructions, but generally, you’ll want to avoid walking on the surface for at least 24 to 48 hours. This curing period allows the compound to harden fully, creating a durable and long-lasting bond between the slabs.
By following these steps, you’ll achieve a strong, secure, and visually appealing paving surface that will last for years.

Final Steps And Clean-Up
After laying your paving slabs and ensuring they are securely in place, the final steps in your project are just as crucial to guarantee a lasting, professional finish. It’s easy to overlook these details, but doing so can impact both the look and longevity of your work. Taking the time to properly check your progress and clean up ensures that your outdoor space looks polished and functions as intended.
Final Touches
The last phase of your project involves a few essential final touches that will elevate the look and ensure everything is securely in place. Here’s how to finish up:
Check the Level Again
Once you’ve laid all your paving slabs, it’s important to revisit the leveling of the entire area. Even if you were diligent during the installation process, small shifts can occur, leaving certain spots uneven. Uneven slabs aren’t just an eyesore—they can cause issues like pooling water or even create tripping hazards. To check the level, use a long spirit level or straightedge to scan across the surface. Pay close attention to any dips or high spots. If you notice unevenness, gently lift the slab and adjust the bedding layer beneath. This might involve adding or removing sand to make the necessary adjustments. After leveling, double-check to confirm the surface is even and solid. This simple step ensures that your paving will stay functional and look great for years to come.
Water the Area
Once you’re satisfied with the leveling, the next step is to lightly water the area. This helps the jointing compound, or whatever material you’ve used to fill the gaps between the slabs, to settle and harden properly. Lightly spray water across the surface, ensuring you don’t oversaturate it, as too much water can wash away the jointing compound. If you used a specific polymeric sand, this step is essential because moisture activates the binding agents in the sand. Be careful not to use a high-pressure hose at this stage, as it could displace the sand and damage the joints. Allow the water to soak in, and you’ll notice that the gaps between your slabs start to look more defined and solid. This step is particularly important if you want your paving to remain strong and resistant to weeds growing between the joints.
Clean Up
A clean workspace is not only satisfying but essential for ensuring your newly laid paving slabs stand out. Once you’ve watered the area, it’s time to remove any remaining debris. This can include excess sand, bits of soil, or leftover jointing material. Using a broom, gently sweep the surface of the slabs, making sure not to disturb the jointing compound. If there are any stubborn spots of debris, you can use a damp cloth to wipe them away. This step helps your paving look tidy and polished, leaving the area ready for use. Additionally, removing leftover materials prevents them from becoming tripping hazards or washing into your garden beds during rainfall. After cleaning up, step back and admire your work—you’ve just completed a durable and attractive outdoor space.
The final steps in your paving project may seem small, but they’re vital for ensuring that the slabs stay level, the joints are properly set, and the area looks clean and professional. By checking the level, lightly watering the area, and thoroughly cleaning up, you ensure a top-quality finish that will stand the test of time. These details not only enhance the visual appeal of your work but also contribute to the overall durability and safety of your outdoor space.
Common Mistakes To Avoid
Laying paving slabs on grass can seem like a simple DIY project, but it’s easy to make mistakes that can lead to frustration down the line. Whether you’re a seasoned DIY enthusiast or a beginner, there are some common pitfalls that many encounter when laying slabs. By being aware of these, you can ensure your paving project is both durable and visually appealing. Here are the most frequent errors people make and tips on how to avoid them.
Not Compacting the Ground Properly
One of the most crucial steps in laying paving slabs on grass is preparing the ground. A common mistake is skipping or rushing this process. If the ground isn’t compacted enough, the paving slabs can shift over time, creating an uneven surface. This can lead to cracks or breaks in the slabs, making the area unsafe and unsightly.
To avoid this, make sure you thoroughly compact the soil before laying the slabs. Use a tamper or plate compactor to firm up the ground, ensuring a stable foundation. If the area is large, renting a mechanical compactor might be worth the investment. A well-compacted base will prevent future issues and prolong the life of your paving.
Laying Slabs Unevenly
Another common error is placing the paving slabs unevenly, which can result in an unprofessional finish. Uneven slabs can also pose a tripping hazard, especially if there’s a significant difference in height between them. This usually happens when the foundation isn’t level, or when slabs are laid too quickly without proper alignment.
To avoid this, always use a spirit level to check the alignment of each slab as you place it. Take your time to ensure each slab sits flat and level with the ones surrounding it. If you notice any unevenness, adjust the base by adding or removing material until you achieve a level surface. Remember, attention to detail at this stage will make a big difference in the final result.
Using Incorrect Materials
Choosing the wrong materials for your project can lead to a range of issues, from weak foundations to mismatched aesthetics. For example, using the wrong type of sand or gravel can result in slabs shifting or sinking over time. Similarly, some slabs are more suited to being placed on grass than others.
Ensure you’re using the appropriate materials for your project. Opt for a sharp sand mix for the base and ensure the gravel is of the correct size for stability. Additionally, choose slabs that are designed for outdoor use and are suitable for laying on grass. If you’re unsure, consult with a professional or seek advice from your local hardware store to ensure you’re making the right choices.
Not Allowing for Proper Drainage
Drainage is often overlooked, but it’s a key element of a successful paving project. If water accumulates under the slabs due to poor drainage, it can cause the base to weaken and lead to slabs becoming uneven or sinking. This issue is particularly common when laying slabs directly on grass, where the soil beneath can retain moisture.
To avoid drainage problems, make sure you incorporate a slight slope when laying your slabs so water can naturally drain away from the surface. You may also consider adding a layer of crushed stone or gravel beneath the base to improve drainage.
Tips for Success
To ensure your paving project turns out just the way you want, here are a few extra tips:
1. Plan Ahead: Measure the area accurately and purchase enough materials to avoid running short halfway through.
2. Check the Weather: Avoid laying slabs in wet or freezing conditions, as this can affect the ground’s stability.
3. Take Your Time: Rushing through any stage of the process is a recipe for mistakes. Be patient, and ensure each step is done correctly.
By avoiding these common mistakes, you’ll have a paving surface that not only looks great but also lasts for years to come. Taking the time to plan, prepare, and use the right materials will ensure a successful project and save you from headaches in the future.
Maintenance Tips For Your New Patio Or Path
Maintaining your patio or path is essential for preserving its appearance and ensuring its longevity. While paving slabs are a durable option for outdoor spaces, they do require some upkeep to keep them looking their best. Below are some simple but effective maintenance tips that will help you protect your investment.
Regular Cleaning
Keeping your paving slabs clean is key to maintaining their appearance. Over time, dirt, debris, and even algae can accumulate, making your patio or path look tired and worn out. Regular sweeping can prevent this buildup, ensuring that dirt doesn’t settle into the gaps between the slabs.
For more thorough cleaning, consider using a power washer. Power washing is particularly effective at removing stains and built-up grime that can’t be easily swept away. However, be cautious with the pressure setting; too high a setting could damage the surface of the slabs or dislodge the sand between them. A medium pressure is typically sufficient to clean the slabs without causing harm.
If you’re concerned about algae or moss, which can become slippery and pose a safety risk, you might also want to use an algae remover or a homemade solution of vinegar and water. Regular cleaning, at least once or twice a year, will keep your patio looking fresh and new.
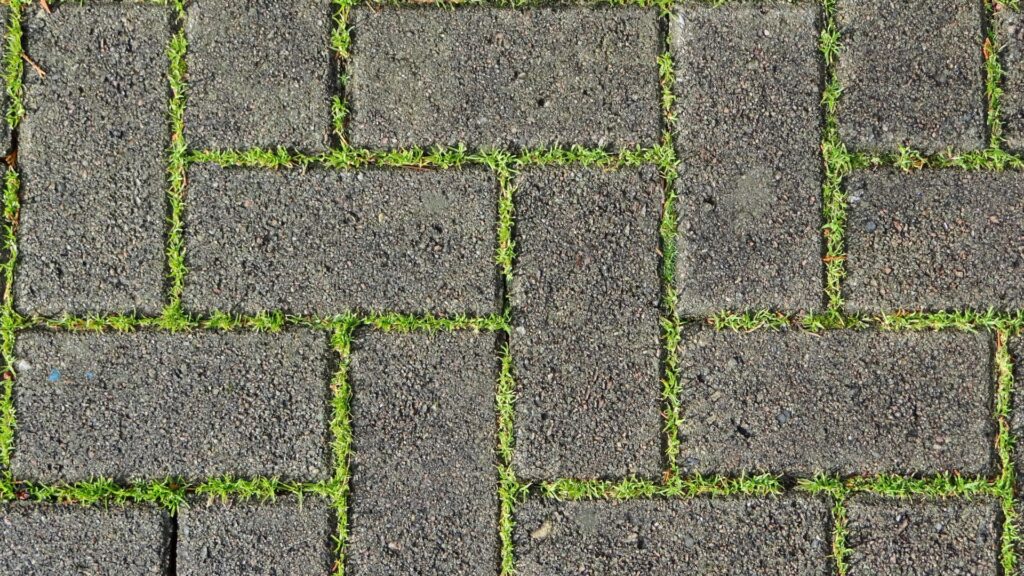
Weed Prevention
One of the most common issues with paved areas is the growth of weeds between the slabs. These unsightly plants can ruin the look of your patio and, over time, cause damage by displacing the slabs.
The best way to prevent weeds from growing is to tackle them early. Applying a weed killer to your patio once every few months can prevent the issue from escalating. For a more environmentally friendly option, boiling water or vinegar can be used to kill weeds without the use of harsh chemicals. Once the weeds are dead, make sure to remove the roots to prevent regrowth.
If weeds are a persistent problem, you might also want to reapply jointing sand or a polymeric sand product to the gaps between your slabs. These products harden when they dry, creating a barrier that makes it much harder for weeds to grow.
Re-leveling Tips
Over time, it’s possible that some of your paving slabs might shift or sink, particularly if they weren’t laid on a solid base. This can not only ruin the appearance of your patio but also create a tripping hazard.
If you notice any uneven slabs, re-leveling them is a straightforward process. First, lift the affected slab using a flat tool, like a spade or a pry bar. Once the slab is removed, you can add more sand or gravel to the base to raise it to the desired level. Compact the base material firmly before replacing the slab, ensuring it sits flush with the surrounding slabs. After re-leveling, reapply jointing sand to fill in any gaps.
For larger areas that may have sunk, it could be necessary to remove and re-lay several slabs, adding additional base material where needed. Addressing uneven slabs early on will help prevent further movement and keep your patio or path looking neat and tidy.
By following these simple maintenance tips, you can keep your patio or path in top condition, ensuring it remains a functional and attractive feature of your outdoor space for years to come.
When To Call A Professional
When it comes to home improvement projects like laying paving slabs, many homeowners take pride in tackling the work themselves. While DIY can be rewarding, some situations call for professional expertise. Knowing when to call in a professional can save you time, money, and stress, especially when the project involves more than just a simple patio.
Complicated Projects
Not every paving job is straightforward. If you’re working on a large patio, sloped land, or an area with complex drainage needs, these are red flags that it’s time to consider hiring a professional. Large patios require careful planning, accurate leveling, and often involve dealing with extensive groundwork. A professional contractor will have the tools and knowledge necessary to ensure that the surface is even and that the base is properly prepared. Uneven terrain, in particular, can pose significant challenges when laying paving slabs. Professionals are trained to deal with grading issues, which are crucial for the long-term durability of your patio or pathway.
Another complication that often goes overlooked is drainage. Proper water drainage is essential to prevent future issues like puddling, erosion, or even damage to your home’s foundation. A professional will know how to slope the patio correctly and install any necessary drainage systems, such as French drains or underground pipes. Addressing drainage improperly can lead to costly repairs down the line, which is why it’s best left to experts.
Cost Considerations
While DIY projects are often seen as cost-saving, there are situations where hiring a professional can actually be more economical in the long run. One major consideration is the cost of tools and materials. For larger projects, you may need specialized tools like plate compactors or concrete mixers, which are expensive to rent or purchase. Additionally, mistakes made during DIY projects can lead to wasted materials and the need for repairs or rework, increasing the overall cost.
Another important factor is time. Laying paving slabs is a time-consuming task, especially for those without experience. What may seem like a weekend project could easily stretch into several weeks, consuming valuable time that could be spent elsewhere. A professional team can complete the job efficiently, often within a few days, while ensuring high-quality workmanship.
Ultimately, it’s important to weigh the potential costs of DIY versus hiring a professional. For complicated or large-scale projects, bringing in an expert can save you money in the long run by avoiding mistakes and ensuring the job is done right the first time.
FAQs: About How To Lay Paving Slabs On Grass
Can I lay paving slabs directly on grass?
It’s not recommended to lay paving slabs directly on grass, as the ground will not provide enough stability. Grass can shift, causing slabs to move or sink over time. Instead, you should remove the grass, add a base layer of hardcore or gravel, and top it with sand to create a stable foundation before laying the slabs.
Do I need to remove all the grass before laying paving slabs?
Yes, it’s important to completely remove the grass before laying paving slabs. Grass left underneath can cause uneven settling, and the roots may continue to grow, destabilizing your paving. You should dig down to an appropriate depth and clear all grass, weeds, and roots.
How deep should I dig when preparing the ground?
The depth you need to dig depends on the thickness of your paving slabs and the base layers you are using. A typical recommendation is to dig around 100mm (4 inches) deep, allowing space for both a layer of hardcore (or gravel) and sand, plus the thickness of the slabs.
What type of sand should I use under paving slabs?
Sharp sand, also known as builder’s sand, is ideal for laying paving slabs. It provides a firm base while still allowing for slight adjustments to level the slabs. Avoid using fine sand, as it can shift too easily.
How do I ensure the slabs are level?
Use a spirit level to check that each slab is laid flat and level. If a slab is uneven, you can add or remove sand beneath it to adjust the level. It’s also helpful to check that each slab is at the same height as the others to create a smooth, even surface.
Do I need a weed membrane under the slabs?
While it’s not strictly necessary, using a weed membrane is highly recommended to prevent weeds from growing up between the slabs. A weed membrane will block light from reaching the soil, which helps to inhibit weed growth over time.
How far apart should paving slabs be spaced?
The spacing between slabs depends on the style you want, but a typical gap is between 10-15mm (about half an inch). Use spacers or a trowel to maintain consistent gaps, which can then be filled with jointing compound or sand to finish.
How long does it take for the jointing compound to set?
Jointing compounds typically take about 24 to 48 hours to fully set, depending on the product and weather conditions. During this time, it’s important to avoid walking on the slabs to ensure the joints stay intact and the slabs remain level.
Can I lay paving slabs on an uneven surface?
It’s best to level the ground as much as possible before laying slabs. If the ground is uneven, the slabs may become unstable and shift over time. You can adjust the level by adding or removing sand beneath the slabs to ensure a flat, even surface.
How can I prevent the paving slabs from sinking over time?
To prevent paving slabs from sinking, ensure that you properly compact the base layers (hardcore and sand) before laying the slabs. Also, make sure the slabs are laid evenly and check their level periodically. Over time, if any slabs begin to sink, you may need to lift them and add more sand or base material underneath.
Conclusion
Laying paving slabs on grass is a straightforward project that can greatly enhance the look and functionality of your outdoor space. To recap, the process involves carefully selecting the right materials, preparing the ground by leveling and removing any debris, and placing a solid base layer of sand or gravel to ensure stability. After positioning the paving slabs, you’ll need to fill the joints with sand or mortar to keep them secure. Regular maintenance, such as cleaning and checking for any shifting slabs, will keep your new patio or path looking pristine for years. We encourage you to give this project a try, as it’s a manageable DIY task that offers rewarding results. If you’ve laid your paving slabs, share your experience in the comments below, or feel free to ask any questions if you need additional advice!
About the Author:
Mike Veail is a recognized digital marketing expert with over 6 years of experience in helping tradespeople and small businesses thrive online. A former quantity surveyor, Mike combines deep industry knowledge with hands-on expertise in SEO and Google Ads. His marketing strategies are tailored to the specific needs of the trades sector, helping businesses increase visibility and generate more leads through proven, ethical methods.
Mike has successfully partnered with numerous companies, establishing a track record of delivering measurable results. His work has been featured across various platforms that showcase his expertise in lead generation and online marketing for the trades sector.
Learn more about Mike's experience and services at https://theleadguy.online or follow him on social media: