Welcome to your ultimate guide on finding the best concrete mix for making paving slabs! Whether you’re a seasoned DIY enthusiast or someone new to working with concrete, choosing the right mix is crucial for creating strong, durable, and attractive paving slabs. In this post, we’ll walk you through everything you need to know about why the correct mix matters, what materials you should use, and how to get the perfect ratio for your project. By the end, you’ll have the confidence and knowledge to craft paving slabs that not only look great but also stand the test of time, helping you achieve the perfect finish for your outdoor space.
The best concrete mix for making paving slabs is a 1:2:4 ratio—1 part cement, 2 parts sand, and 4 parts gravel. This mix provides a balance of strength, durability, and workability, ideal for DIY projects like patios and pathways. For heavier-duty slabs, such as driveways, a stronger mix of 1:1.5:3 (cement, sand, gravel) may be more suitable. Adjust the water-cement ratio carefully to ensure a solid, crack-resistant slab.
- Why Concrete Mix Matters For Paving Slabs?
- Key Components Of Concrete For Paving Slabs
- Recommended Concrete Mix Ratios For Paving Slabs
- Step-By-Step Guide To Mixing Concrete For Paving Slabs
- Tips For Pouring And Setting Concrete Paving Slabs
- Common Mistakes To Avoid When Making Concrete Paving Slabs
- Enhancing The Durability Of Your Paving Slabs
- Eco-Friendly Concrete Mix Options For Paving Slabs
- Pre-Mixed Concrete Vs. DIY Concrete: Which Is Better For Paving Slabs?
- FAQs: About Best Concrete Mix For Making Paving Slabs
- What is the best concrete mix ratio for paving slabs?
- Can I use pre-mixed concrete for paving slabs?
- How thick should concrete paving slabs be?
- How long does it take for concrete paving slabs to cure?
- Do I need to reinforce my concrete paving slabs?
- What happens if I add too much water to the concrete mix?
- Can I color concrete for paving slabs?
- What type of cement is best for making paving slabs?
- Should I seal my concrete paving slabs?
- How can I make my paving slabs more eco-friendly?
- Conclusion
Why Concrete Mix Matters For Paving Slabs?
When it comes to laying paving slabs, the quality of the concrete mix is crucial. It directly affects the strength, durability, and overall performance of your slabs. Choosing the right concrete mix is one of the most important decisions you’ll make in ensuring that your patio, driveway, or garden path stands the test of time. Here’s why it matters so much.
Importance of a Quality Mix
Concrete is essentially the backbone of any paving slab. It’s what holds everything together, providing the foundation that ensures your slabs stay strong and in place. A good concrete mix typically includes the right balance of cement, sand, and aggregate (such as gravel), and it plays a key role in creating slabs that can withstand both heavy foot traffic and the elements. If the mix is weak or incorrectly proportioned, you risk your slabs cracking, shifting, or even breaking over time. This is especially critical in areas exposed to frequent rainfall, frost, or temperature changes, where the slabs can be subject to expansion and contraction.
A high-quality concrete mix ensures that your paving slabs have the structural integrity to resist pressure and wear, giving you peace of mind that your outdoor space will remain intact for years to come.
Key Benefits of the Right Mix
One of the most noticeable benefits of using the right concrete mix is the longevity it provides. A well-prepared mix strengthens the slabs, making them less prone to cracking or splitting due to weather or load stress. With the right blend of materials, the concrete can resist water infiltration, which often leads to freeze-thaw cycles that cause cracking in colder climates.
Moreover, a quality mix offers enhanced weather resistance. Whether it’s extreme heat, frost, or heavy rain, the right mix helps your paving slabs maintain their integrity against the elements. By investing in a top-notch concrete mix from the start, you’ll reduce the need for costly repairs or replacements in the future, saving both time and money.
Impact on Appearance and Finish
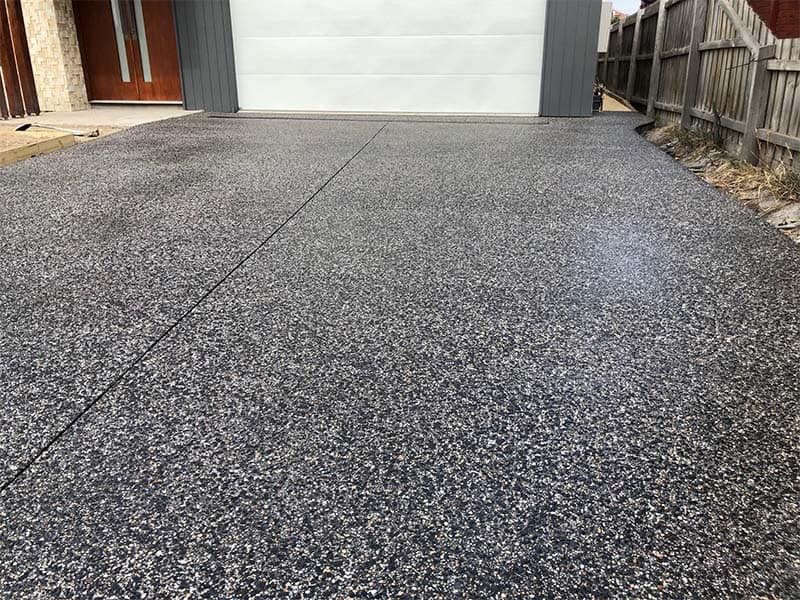
Concrete mix doesn’t just affect the durability of your paving slabs; it also plays a role in how they look. The smoother and more consistent the mix, the better the finish of your slabs will be. A poor mix can result in uneven textures, pits, or even discoloration, taking away from the aesthetic appeal of your outdoor space.
On the other hand, a properly mixed batch of concrete creates a more polished and uniform surface. This is particularly important if you’re aiming for a clean, modern look in your outdoor design. A well-mixed concrete slab will have fewer air pockets, creating a smoother finish that can make your entire patio or walkway look more professionally crafted.
Choosing the right concrete mix is essential for both the strength and appearance of your paving slabs. A high-quality mix offers durability, weather resistance, and a sleek, polished finish, ensuring your outdoor space remains both functional and beautiful for years to come.
Key Components Of Concrete For Paving Slabs
When crafting durable and long-lasting paving slabs, the quality and composition of the concrete mix are crucial. Every ingredient plays a specific role in ensuring the slabs are robust enough to withstand outdoor conditions while maintaining an attractive appearance. Let’s break down the key components that go into making high-quality concrete for paving slabs.
Cement: The Binding Agent
Cement is the essential binder in the concrete mix, acting as the glue that holds everything together. The most commonly used type is Portland cement, favored for its strength and versatility. Portland cement is made from a mixture of limestone, clay, and iron ore, which are heated at high temperatures to form clinker, later ground into a fine powder. This powder reacts with water, forming a paste that hardens and binds the aggregates in the mix.
There are also variations of Portland cement, including rapid-hardening cement and sulfate-resistant cement, each suited to specific environments. For example, rapid-hardening cement is ideal for projects that require quick results, while sulfate-resistant cement is better suited for environments where the concrete may be exposed to high levels of sulfate, such as in coastal areas. Choosing the right type of cement for your paving slab project ensures that the finished product meets your specific needs for durability and longevity.
Aggregates: Providing Structure and Stability
Aggregates, such as sand, gravel, and crushed stone, make up a significant portion of the concrete mix, typically around 60-80% of the total volume. Their primary role is to provide structure and stability to the concrete. The mix typically includes two types of aggregates: fine and coarse.
- Fine aggregates: Sand is the most common fine aggregate used in concrete for paving slabs. It helps fill the gaps between the larger aggregates and ensures a smooth surface finish.
- Coarse aggregates: Gravel or crushed stone acts as the backbone of the concrete, providing strength and rigidity. Larger particles are essential for reducing the amount of cement paste required, which helps in reducing costs and minimizing shrinkage in the final product.
The size and shape of the aggregates are crucial in determining the overall strength and finish of the paving slabs. Well-graded aggregates, meaning a mix of different sizes, result in stronger concrete by ensuring there are fewer gaps in the structure.
Water: The Critical Balancing Act
Water plays a pivotal role in the hydration process, where it reacts with the cement to form a hardened product. The water-cement ratio, however, is a delicate balance that significantly impacts the final strength and durability of the concrete. Too much water can weaken the mix by increasing the porosity of the final product, making it more prone to cracks and damage over time. Conversely, too little water can make the concrete difficult to work with, resulting in poor compaction and uneven surfaces.
For paving slabs, the ideal water-cement ratio is typically between 0.4 and 0.6, depending on the specific mix and environmental conditions. This range provides enough moisture for proper hydration without compromising the strength of the concrete. It’s essential to maintain this balance to ensure the paving slabs are both durable and workable during installation.
Additives: Enhancing Performance and Durability
In some cases, additives are incorporated into the concrete mix to enhance its workability, strength, or durability. While optional, these additives can significantly improve the quality of the paving slabs, especially in challenging environments or for specific aesthetic or functional goals. Common additives include:
- Plasticizers: These chemicals improve the workability of the concrete without the need for additional water. This is particularly useful when working with complex forms or when a smooth surface finish is desired.
- Air-entraining agents: These additives introduce microscopic air bubbles into the concrete mix, which help improve its resistance to freeze-thaw cycles. This is especially important in colder climates where paving slabs are exposed to harsh weather conditions. The tiny air pockets allow room for water to expand when it freezes, preventing the concrete from cracking.
- Accelerators: These speed up the curing process, which can be useful in time-sensitive projects or colder environments where concrete naturally takes longer to set.
- Retarders: On the flip side, retarders slow down the curing process, which can be beneficial in hot climates where the concrete might set too quickly, leading to shrinkage and cracking.
Using the right combination of these components will result in high-quality paving slabs that are durable, visually appealing, and suited to the specific demands of your project.
Understanding the key components of concrete for paving slabs helps ensure a high-quality result. By carefully selecting the right type of cement, aggregates, and water-cement ratio, and considering optional additives, you can create paving slabs that stand the test of time, both in terms of strength and appearance. Whether you’re working on a patio, pathway, or driveway, a solid understanding of these ingredients will set the foundation for success.
Recommended Concrete Mix Ratios For Paving Slabs
When creating durable, attractive paving slabs, getting the right concrete mix ratio is key. The ratio of cement, sand, and gravel in your mix directly influences the strength, durability, and finish of your slabs. Here’s a breakdown of the best concrete mix ratios for DIY projects and specific needs, including advice on when and how to adjust these proportions for optimal results.
Standard DIY Mix: 1:2:4 Ratio
For most paving slab projects around your home—whether you’re laying a garden path or creating a patio—the standard concrete mix ratio is 1 part cement, 2 parts sand, and 4 parts gravel. This is commonly referred to as the 1:2:4 mix. It strikes the perfect balance between strength and ease of use, making it ideal for DIYers.
- Cement: The binding agent that holds everything together.
- Sand: Provides the bulk and texture.
- Gravel: Adds durability and strength to the concrete.
This mix is easy to work with, giving you strong and long-lasting paving slabs that can handle typical garden use and light foot traffic. It’s also forgiving in terms of mixing consistency, meaning you can achieve good results even if you’re not an expert in concrete work.
High-Strength Mix: 1:1.5:3 Ratio
If your paving slabs will be placed in heavy-duty areas, such as a driveway or a high foot traffic zone, you’ll need a mix that offers extra strength. A 1:1.5:3 ratio—1 part cement, 1.5 parts sand, and 3 parts gravel—provides a more robust option. This mix creates paving slabs that can withstand the additional weight and wear, making it ideal for areas subjected to vehicles or regular heavy use.
The increased amount of cement in this mix results in stronger slabs with better resistance to cracking or crumbling over time. However, this mix may be slightly harder to work with because it sets more quickly, so it’s important to plan your project carefully and be prepared to work at a brisker pace.
Adjusting the Mix for Different Needs
Depending on your project, you can tweak the standard mix to suit specific requirements:
- More cement for stronger slabs: If you want to increase the strength of your paving slabs without jumping to a high-strength mix, simply add more cement to the standard 1:2:4 ratio. For example, increasing the cement proportion will make the mix stronger and more resistant to heavy loads or weathering.
- More sand for smoother finishes: If your project demands a smoother surface—perhaps for decorative paving slabs—consider adding more sand to the mix. Sand contributes to the texture of the finished slab. By increasing the sand ratio slightly, you can achieve a finer finish that’s more polished and visually appealing.
- Less gravel for lightweight applications: In some cases, such as for decorative or ornamental paving slabs that won’t bear much weight, reducing the amount of gravel can create a lighter, more workable mix. This can also result in slabs that are easier to shape or customize.
Choosing the right concrete mix ratio depends on the specific requirements of your paving slab project. For standard garden paths and patios, the 1:2:4 mix is a reliable go-to, while high-strength areas benefit from the more robust 1:1.5:3 ratio. Always adjust your mix based on the needs of your space, whether that’s more strength, a smoother surface, or lighter slabs for less intensive use.
Step-By-Step Guide To Mixing Concrete For Paving Slabs
When it comes to creating durable and long-lasting paving slabs, the process of mixing concrete is crucial. Understanding how to mix concrete properly will ensure your slabs are strong, weather-resistant, and aesthetically pleasing. Here’s a comprehensive guide to help you through the process, whether you’re working by hand or using a mixer.
Tools and Materials You’ll Need
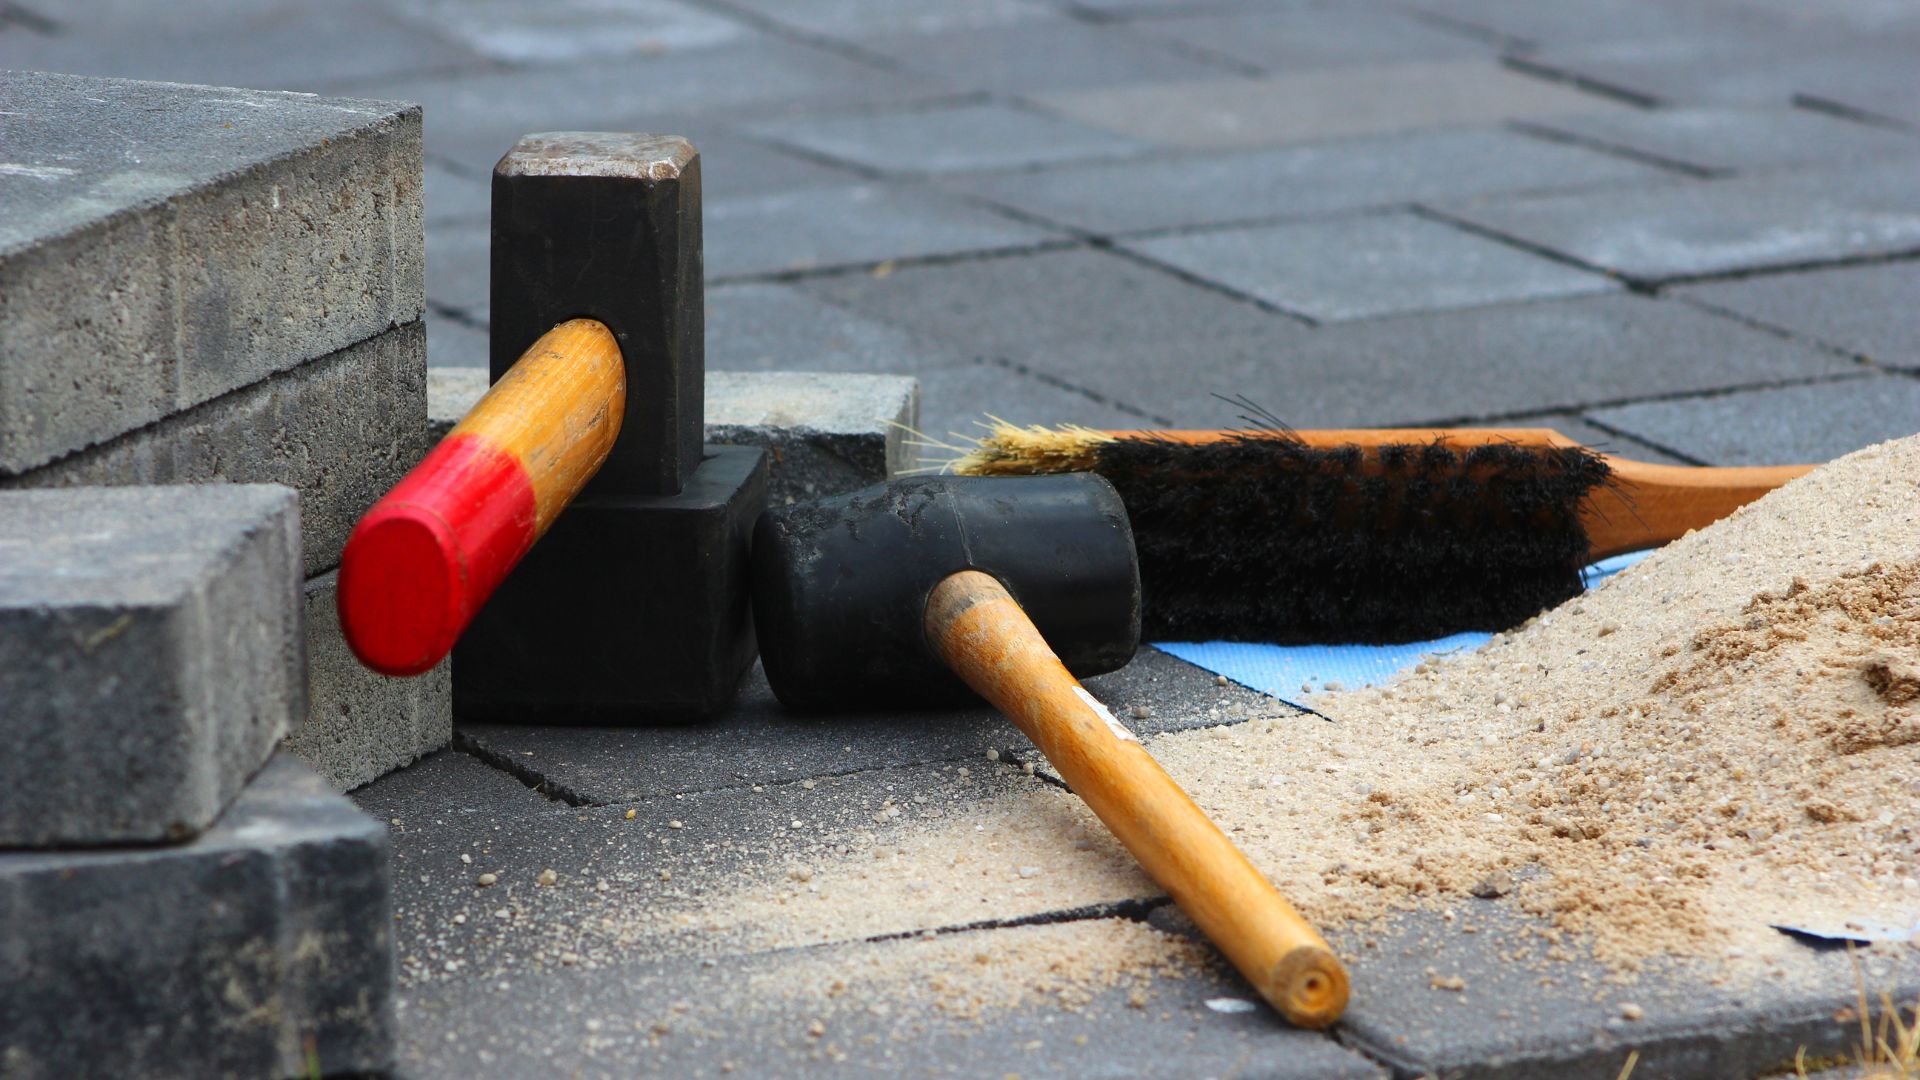
Before you begin, it’s essential to gather all the necessary tools and materials for mixing concrete. Having everything on hand will make the process smoother and more efficient. Here’s a basic list:
- Mixing tray or wheelbarrow: A large, sturdy surface where you’ll mix the concrete. A wheelbarrow can also serve this purpose if you need mobility.
- Spade or shovel: For blending the ingredients. A spade is ideal for hand-mixing, while a shovel may be more convenient for transferring larger quantities.
- Measuring bucket: To ensure you use the correct proportions of cement, sand, gravel, and water. Accurate measurements are key to a strong mixture.
- Water supply: Clean water is essential for activating the cement. A garden hose or bucket of water nearby will keep the process moving without interruptions.
- Protective gear: Don’t forget gloves and a dust mask, especially when handling dry cement, as it can be irritating to the skin and lungs.
Mixing by Hand vs. Using a Mixer
When mixing concrete for paving slabs, you have two primary options: mixing by hand or using a concrete mixer. Each method has its advantages and disadvantages, so let’s break them down.
- Mixing by hand: This method is ideal for smaller jobs or if you don’t have access to a concrete mixer. The main advantage is that it requires minimal equipment—just a mixing tray or wheelbarrow, a spade, and some muscle power. It’s also easier to control the consistency of your mix, adjusting it as you go. However, it can be labor-intensive and time-consuming, especially if you’re working on a larger project.
- Using a mixer: For larger projects or if you want to save time and effort, a concrete mixer is a great option. The primary benefit is efficiency—mixers can blend larger quantities of concrete much faster than hand-mixing. They also tend to produce a more consistent mixture. On the downside, mixers can be costly to rent or purchase, and you’ll need space to store and operate them. Additionally, cleaning a mixer after use requires extra time and care to prevent hardened concrete from sticking to the machine.
The Mixing Process
Now that you’ve got your tools ready and decided on your mixing method, it’s time to start the process. Whether you’re mixing by hand or using a mixer, the steps are similar, though a mixer will simplify some of the more labor-intensive parts.
1. Measure the ingredients: The standard ratio for a strong concrete mix is usually 1 part cement, 2 parts sand, and 4 parts gravel or aggregate. These measurements should be precise to ensure the right consistency and strength. Use a measuring bucket to keep your ratios accurate. For example, if you’re making a small batch, you might use one bucket of cement, two buckets of sand, and four buckets of gravel.
2. Mix the dry components first: Before adding any water, thoroughly blend the dry materials—cement, sand, and gravel—together. If you’re mixing by hand, use your spade to shovel the ingredients back and forth until they are evenly distributed. If you’re using a mixer, pour the dry components in and let the machine run for a couple of minutes to achieve an even mixture.
3. Slowly add water: Water is what activates the cement, turning your dry mixture into workable concrete. Start by adding a small amount of water, slowly pouring it into the dry mix. If you’re hand-mixing, create a well in the center of your mixture and gradually incorporate the water. For mixer users, pour the water in while the mixer is turning.
The goal is to achieve a smooth, thick consistency—not too wet and not too dry. You want the concrete to hold its shape when molded, but still be pliable enough to spread easily. Add water incrementally and mix until all the dry ingredients are fully combined. Avoid adding too much water at once, as it can weaken the mix.
4. Check consistency: Once the mix appears uniform, perform a slump test by scooping some concrete and seeing how it holds its shape. If it’s too runny, add a bit more dry mix (sand or cement); if it’s too stiff, add a bit more water.
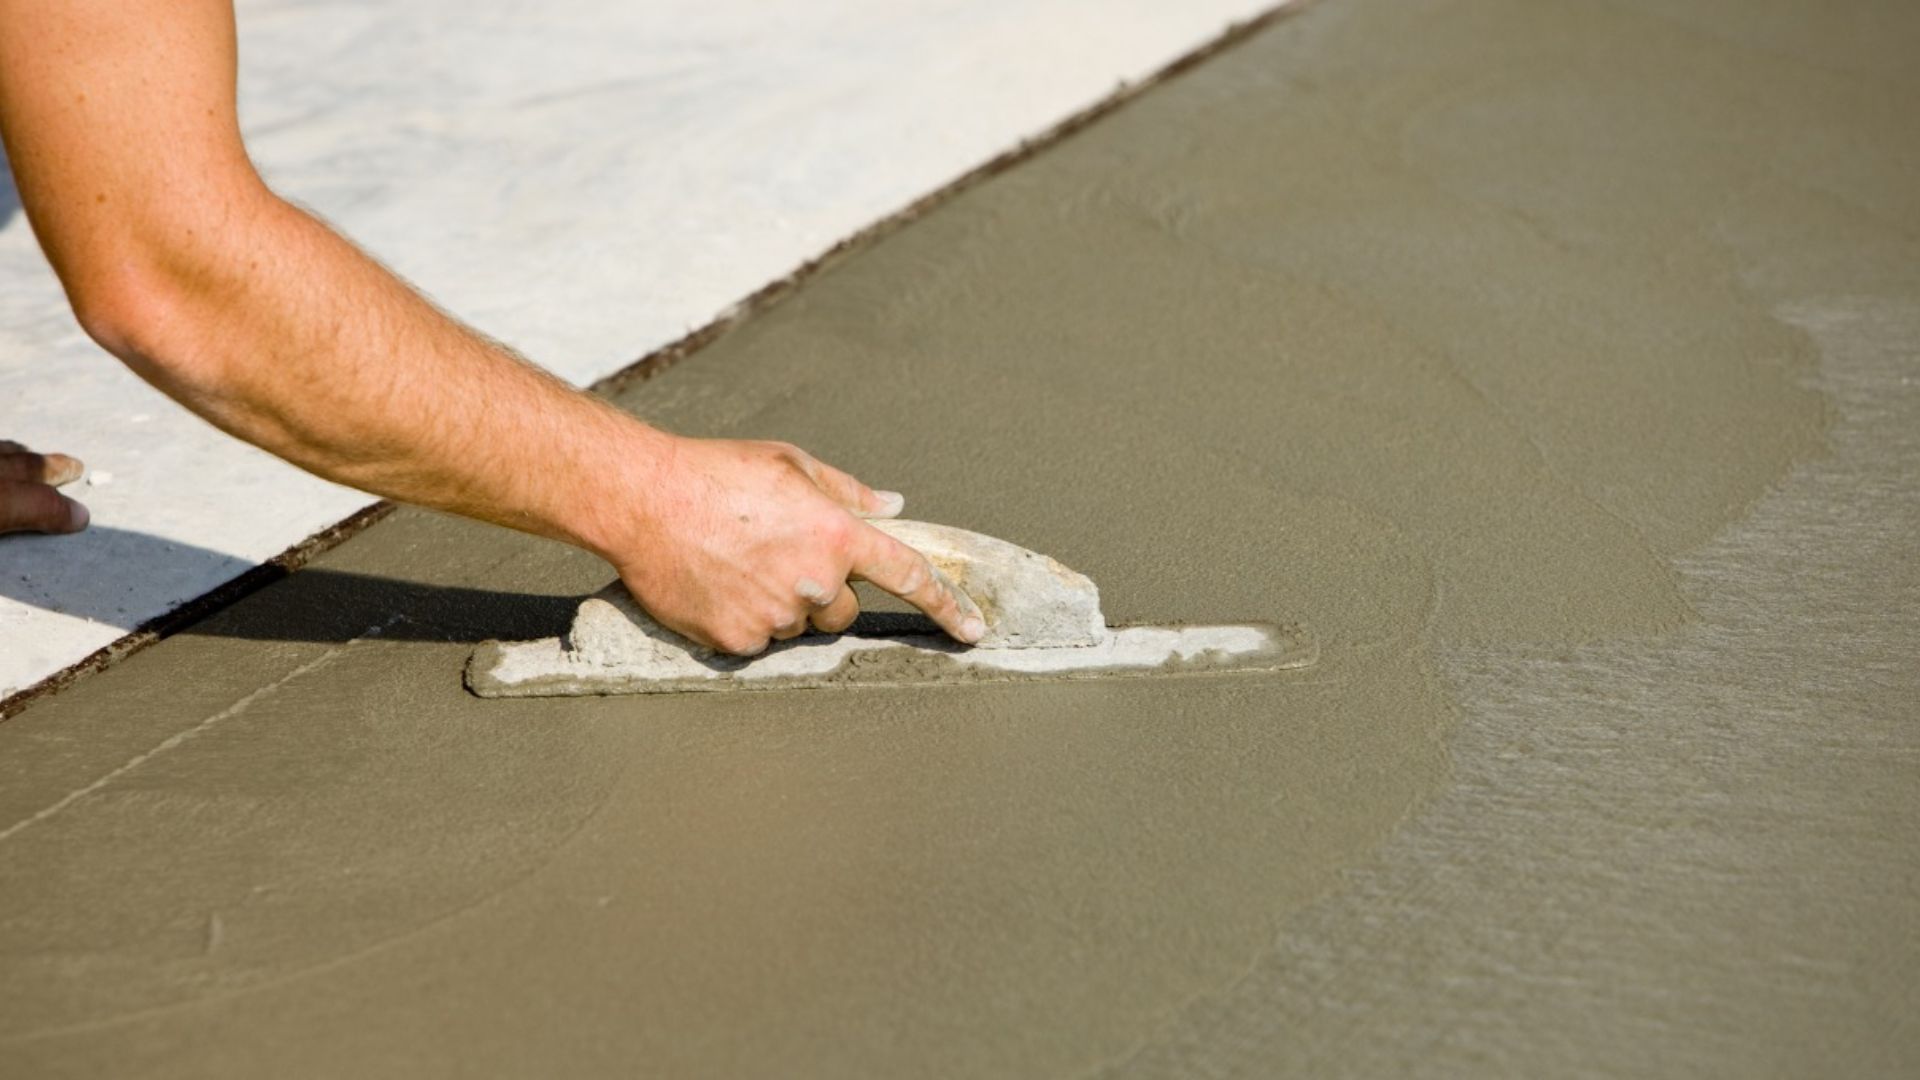
5. Use the mix immediately: Concrete sets relatively quickly, so as soon as you’ve got the right consistency, you should begin pouring it into your paving slab molds or frames. Smooth the surface with a trowel, ensuring there are no air pockets or uneven spots.
Whether you choose to mix by hand or use a mixer, following these steps carefully will ensure your concrete is strong and durable for your paving slabs. Getting the right consistency, using accurate measurements, and mixing thoroughly are all critical to achieving a professional-quality result.
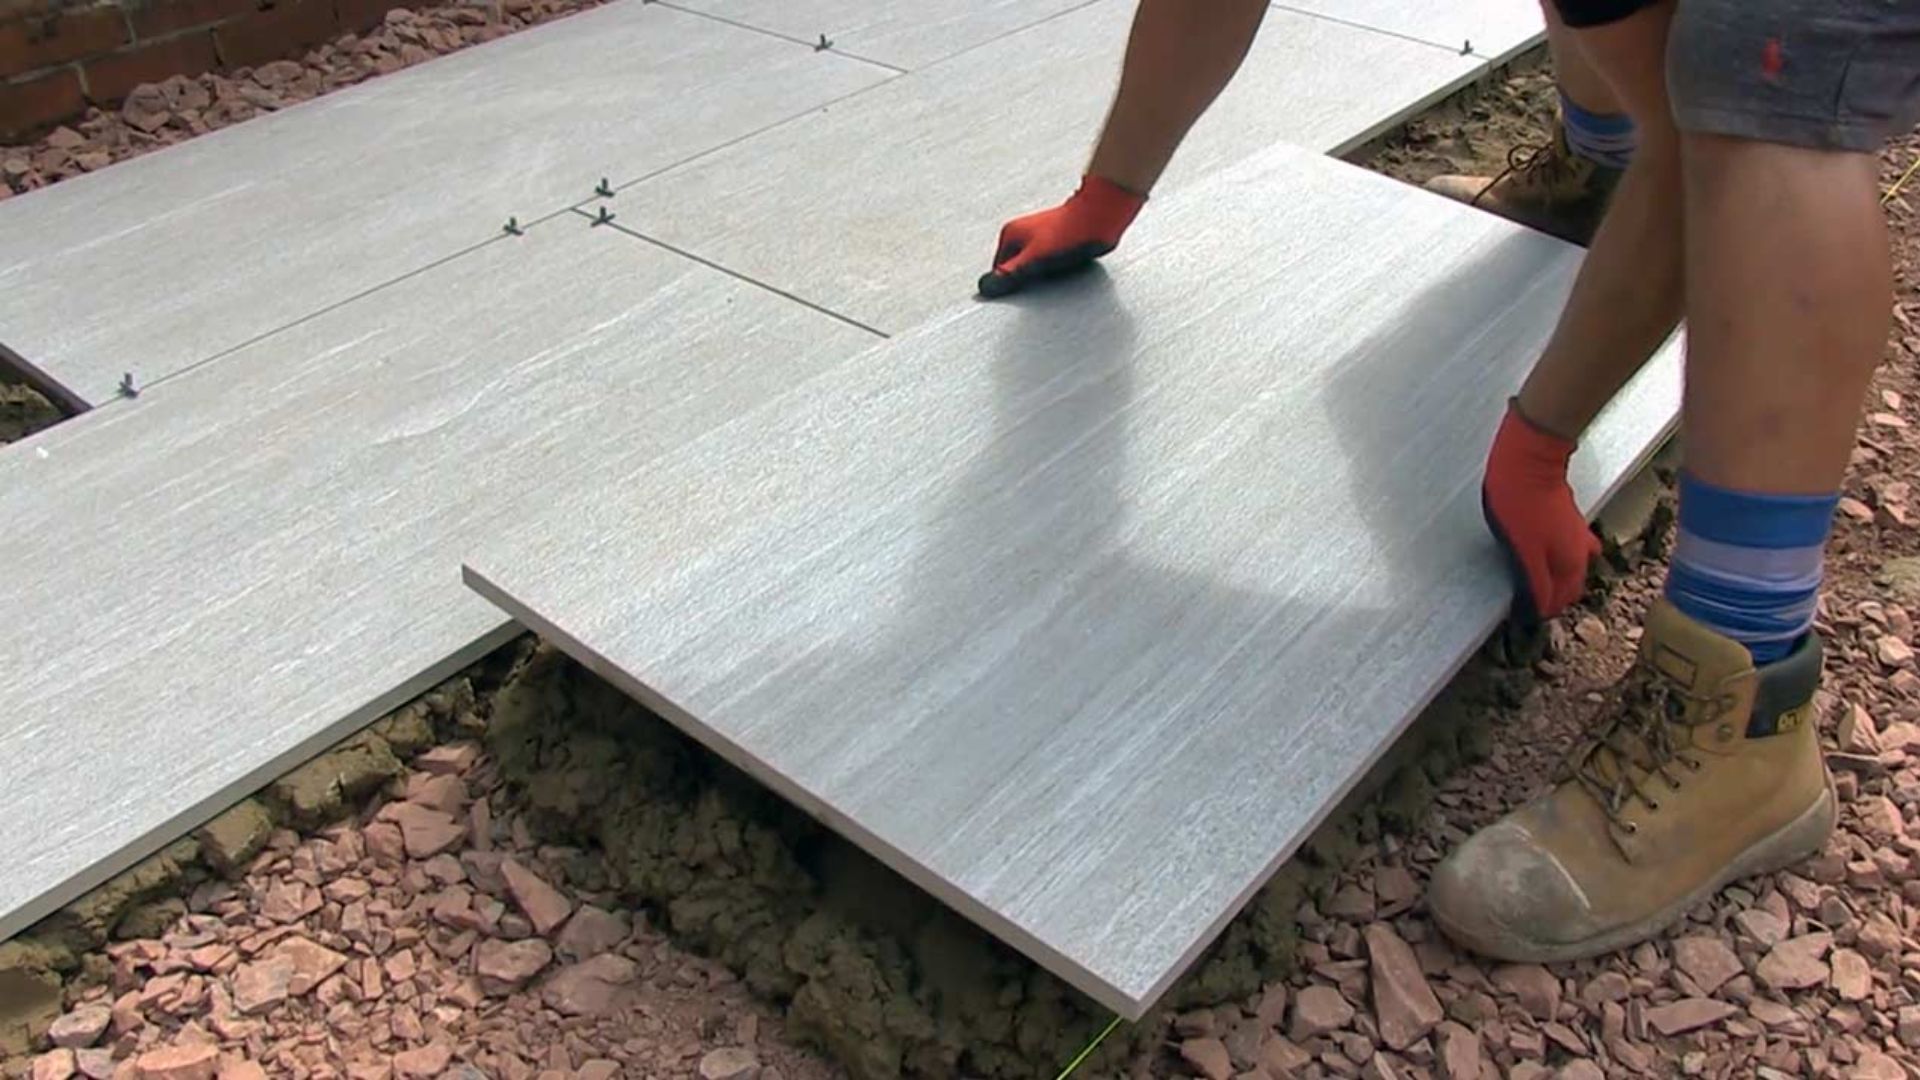
Tips For Pouring And Setting Concrete Paving Slabs
When it comes to pouring and setting concrete paving slabs, attention to detail is crucial for long-lasting, professional results. From evenly spreading the mix to ensuring proper curing, every step plays a significant role in the overall quality of the project. Below, we’ll go over some essential tips for each stage to ensure you achieve a smooth, durable finish.
Pouring the Mix: Best Practices for Evenly Spreading and Leveling
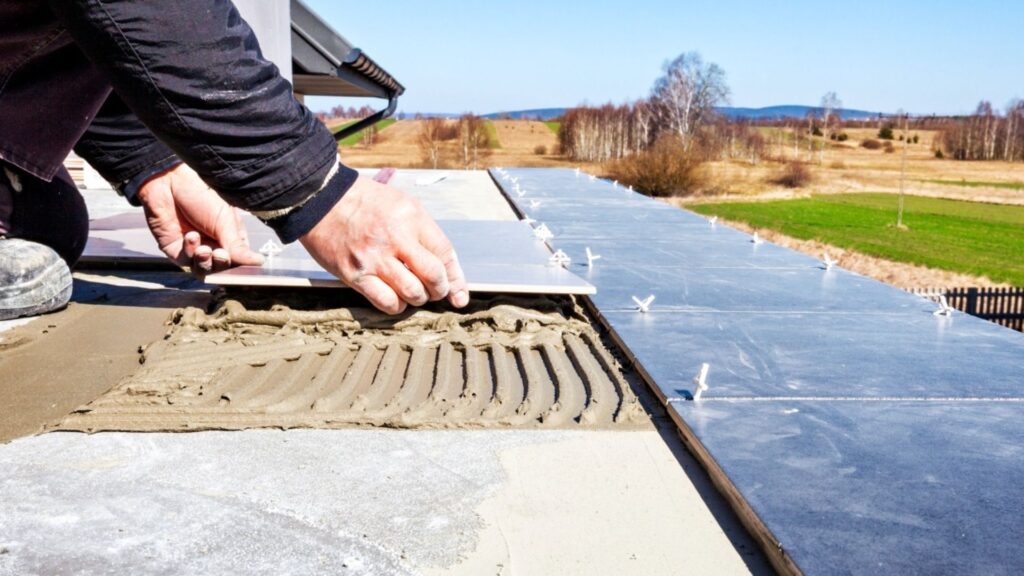
The first step in pouring concrete paving slabs is ensuring that the concrete mix is evenly distributed. This process is vital because it determines the strength and appearance of the finished slab. Start by mixing the concrete according to the manufacturer’s instructions, ensuring the right consistency. A mix that’s too wet or too dry will compromise the quality of your slabs.
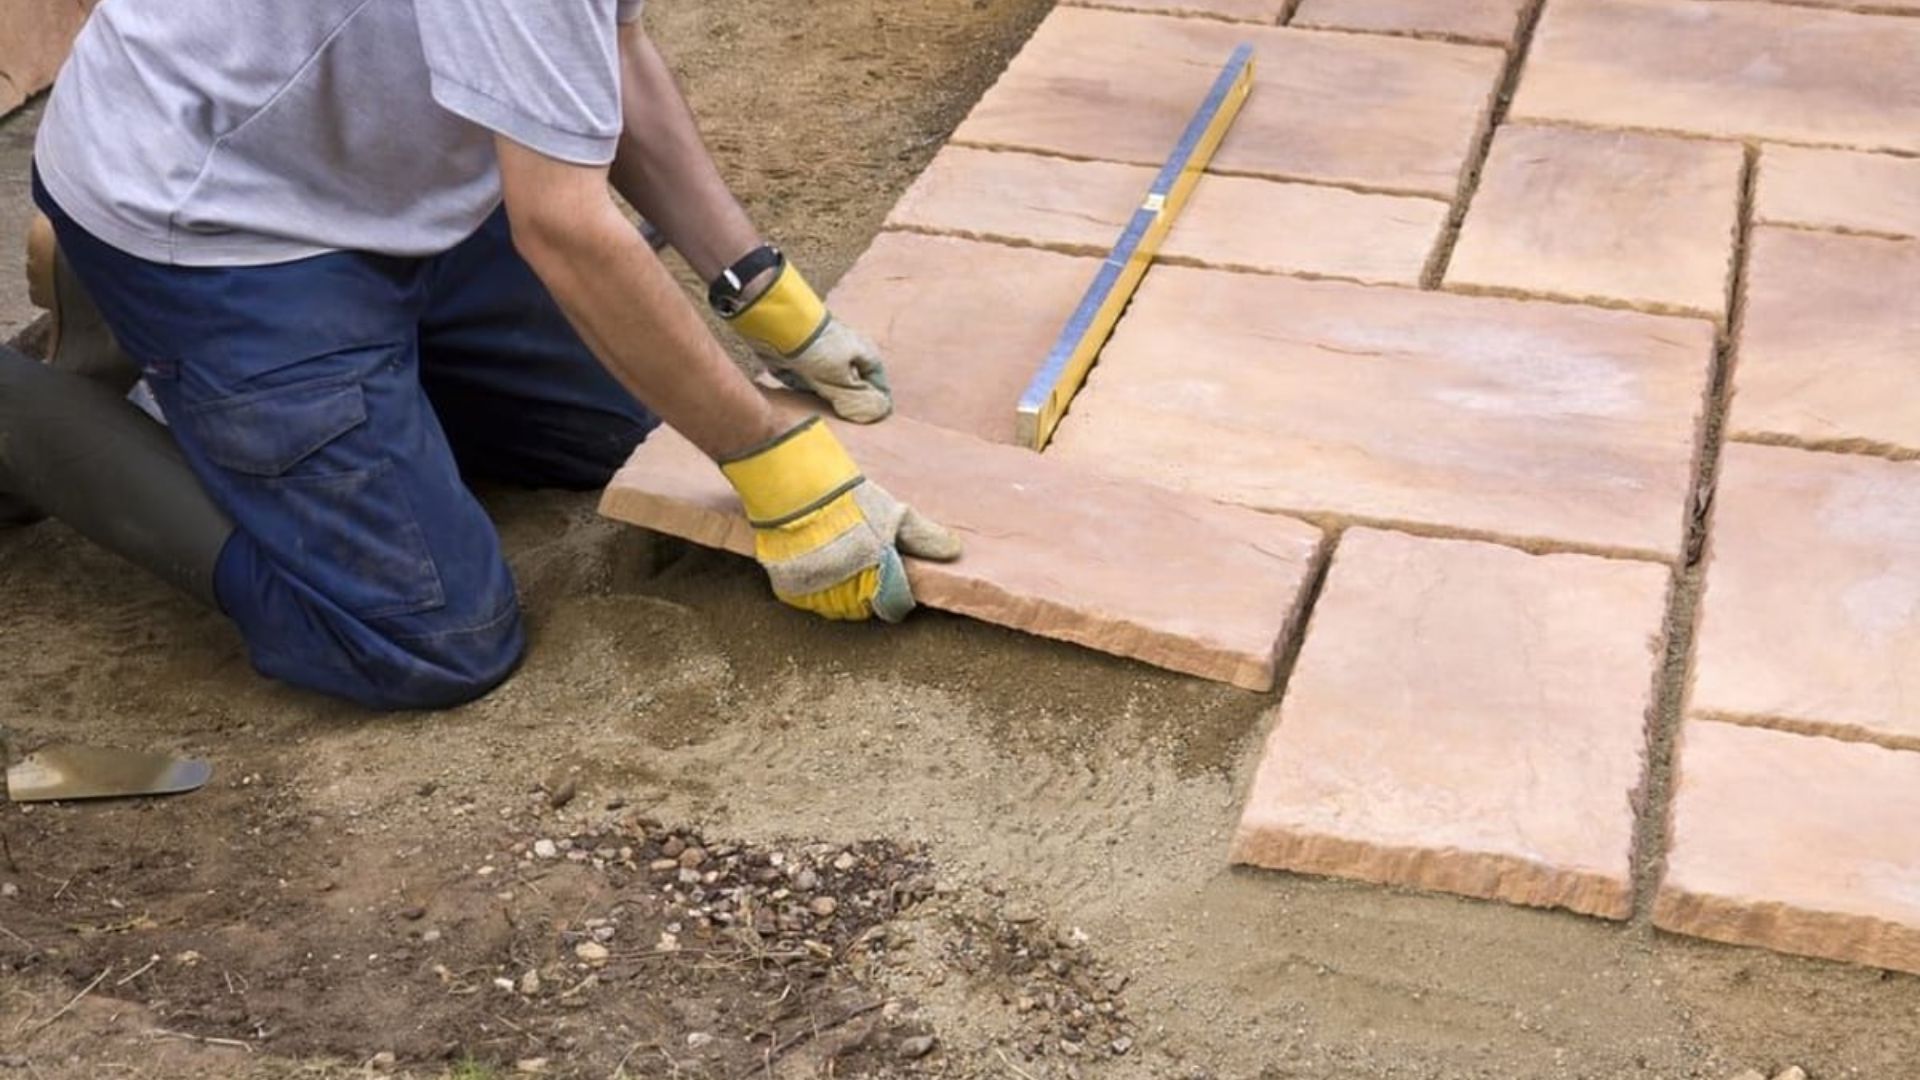
Once mixed, pour the concrete into the designated area or mold in small, manageable batches. Use a shovel or trowel to spread the mixture evenly across the surface. For larger areas, it’s best to work with a partner, pouring and spreading the concrete simultaneously to prevent any areas from drying unevenly. As you spread the concrete, use a screed (a straight-edged board) to level the surface. Glide it back and forth in a sawing motion to ensure the surface is smooth and even.
After leveling, use a trowel to smooth out any visible imperfections, bubbles, or low spots. Paying close attention to these details ensures that your slab will set evenly, minimizing the risk of cracking or structural issues later on.
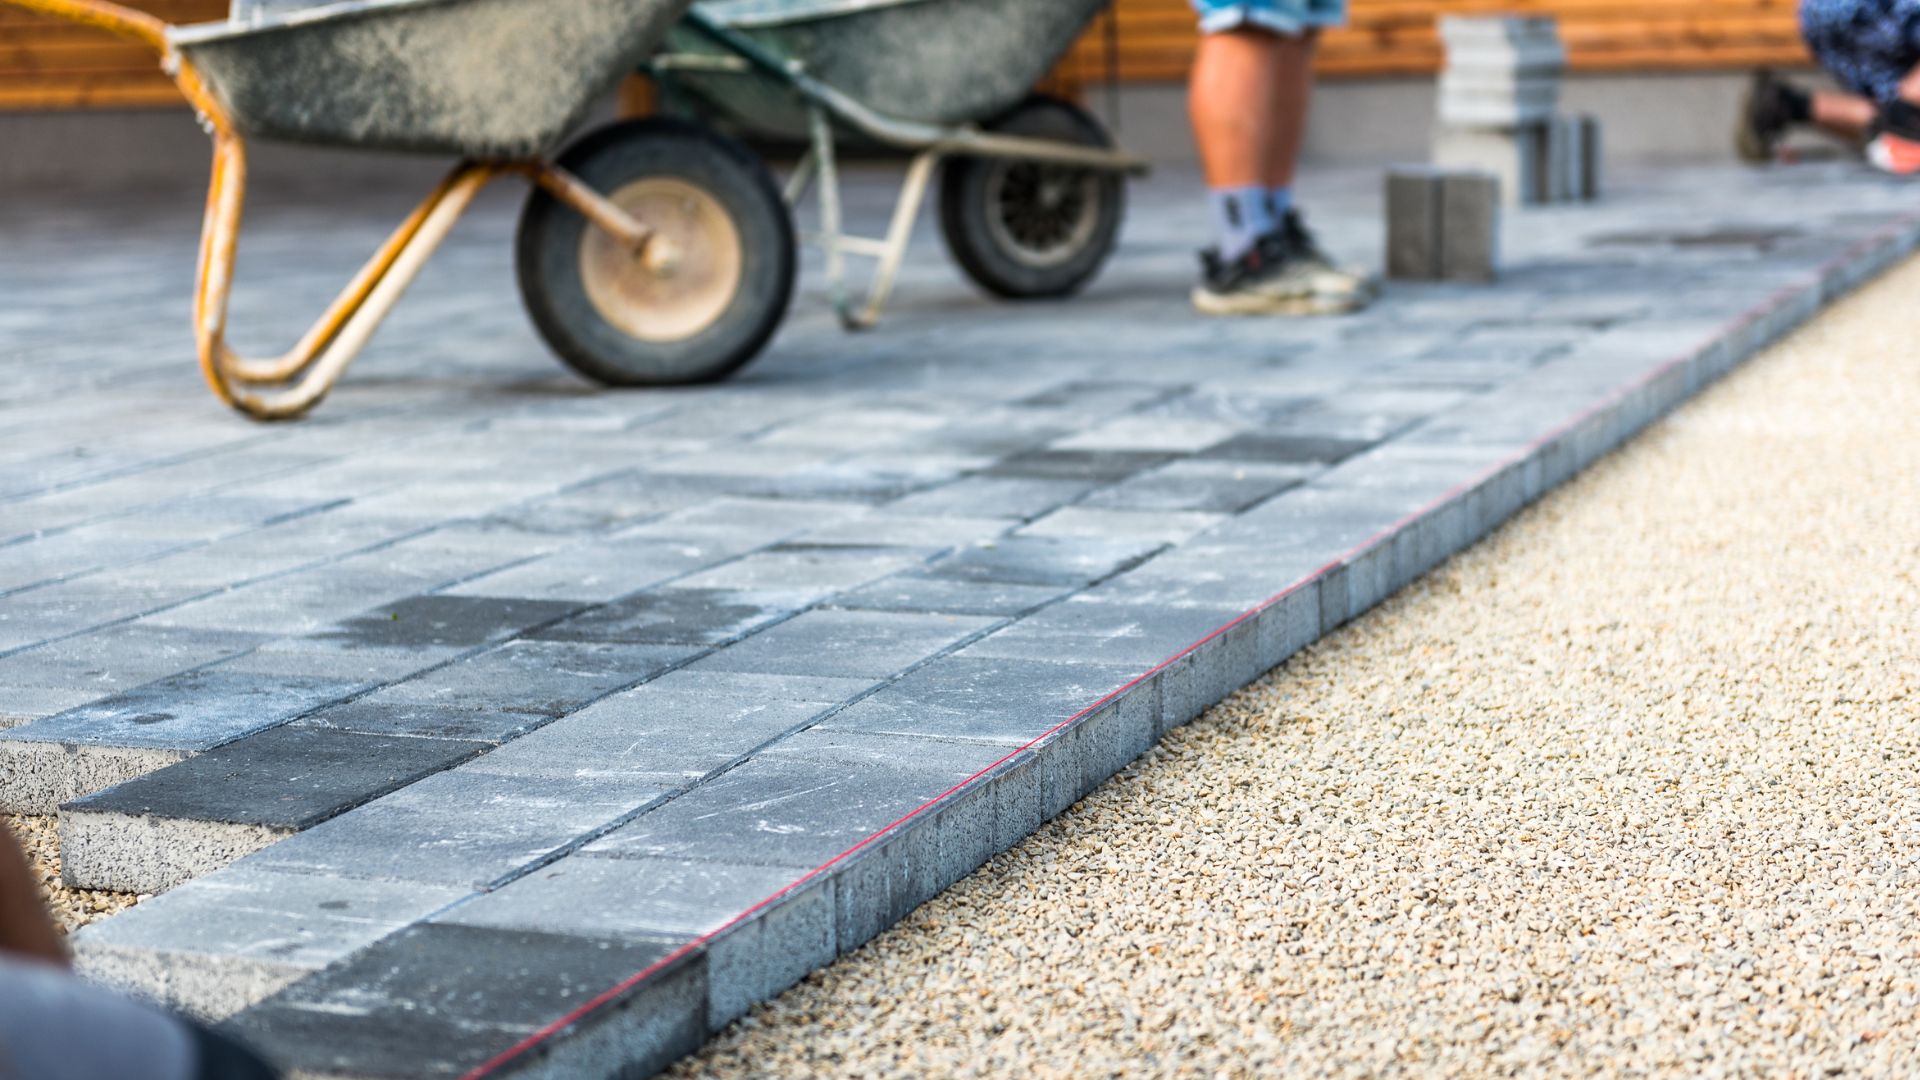
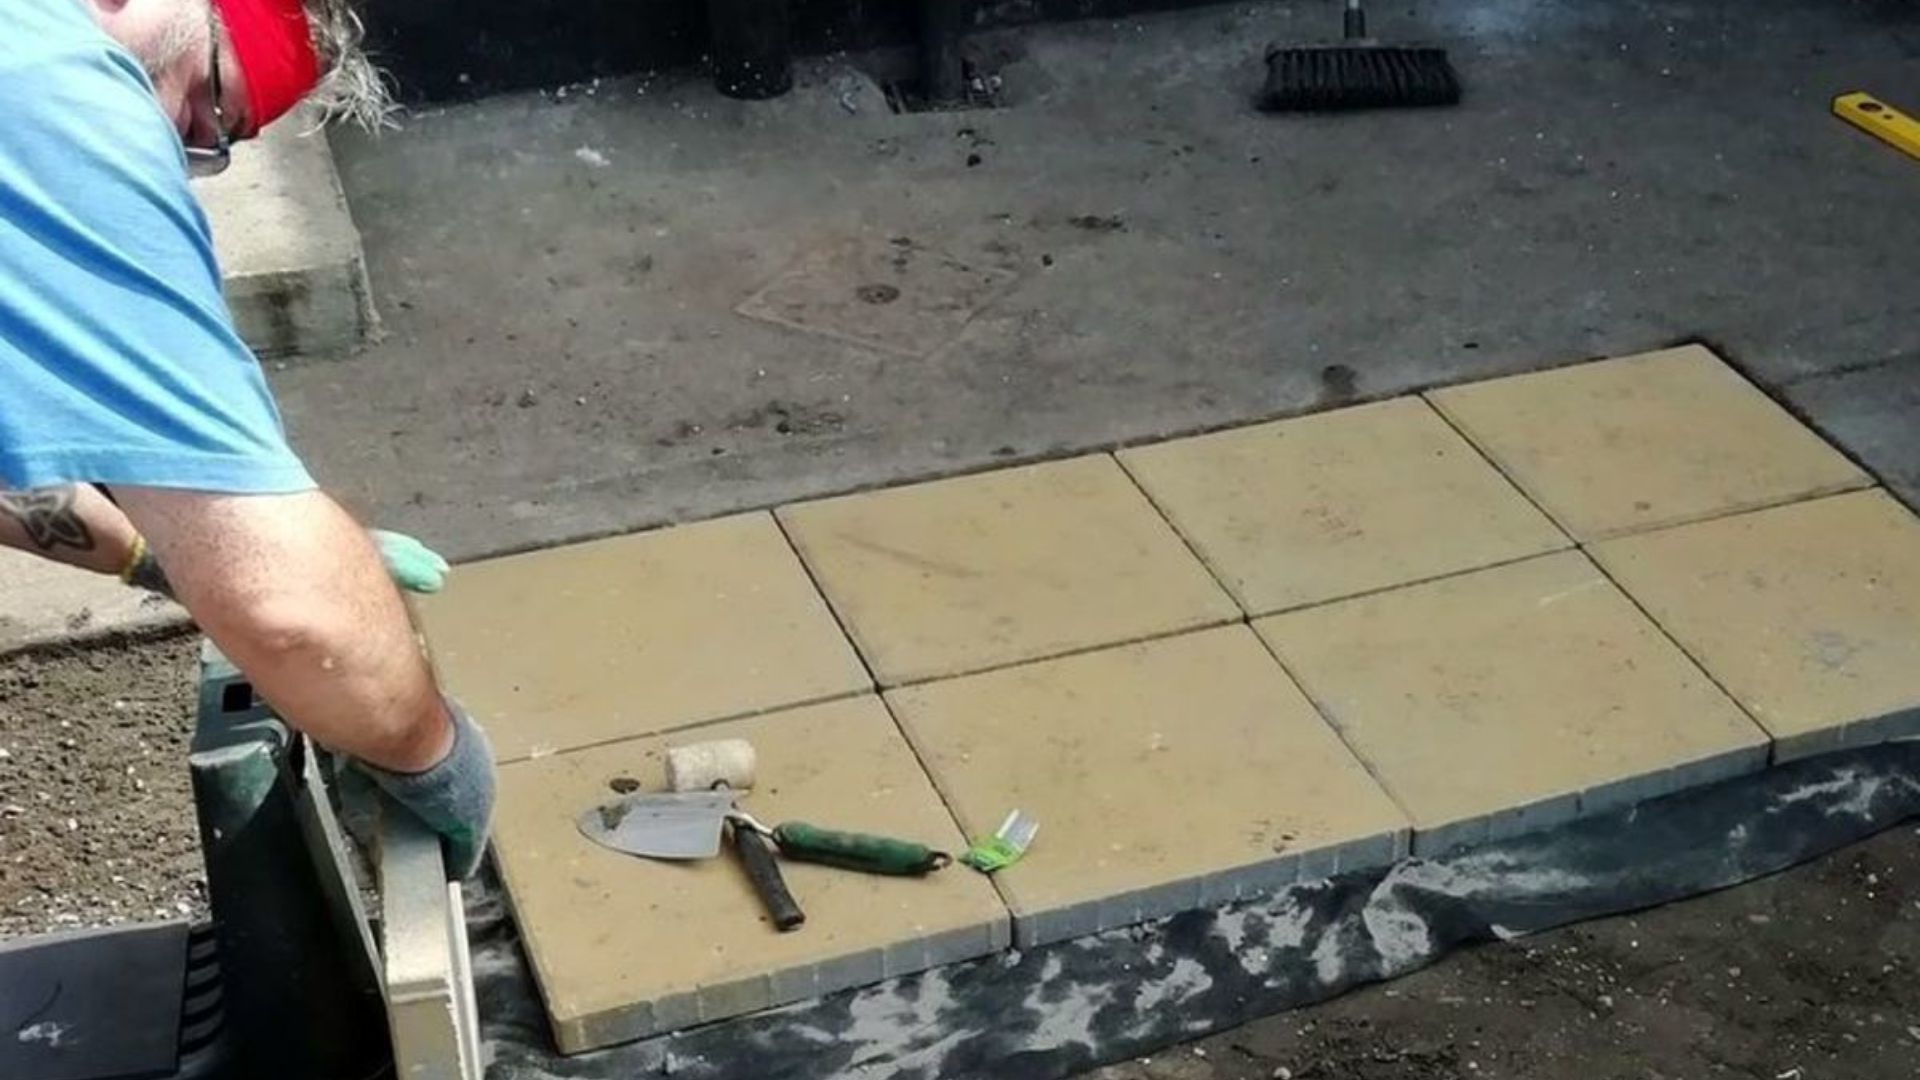
Using Molds or Frames: Keeping the Concrete in Place
Using molds or frames to shape your concrete paving slabs is highly recommended, especially for those seeking consistency in size and shape. Molds can be purchased or custom-made, and they allow you to create uniform slabs, which are ideal for patios, walkways, or decorative paths.
Before pouring the concrete, ensure that the mold or frame is clean and adequately prepared. If you’re working with wooden frames, coat the inside with a mold release agent or a light oil spray to prevent the concrete from sticking once it hardens. Position the mold or frame on a stable surface to avoid any movement during the pour.
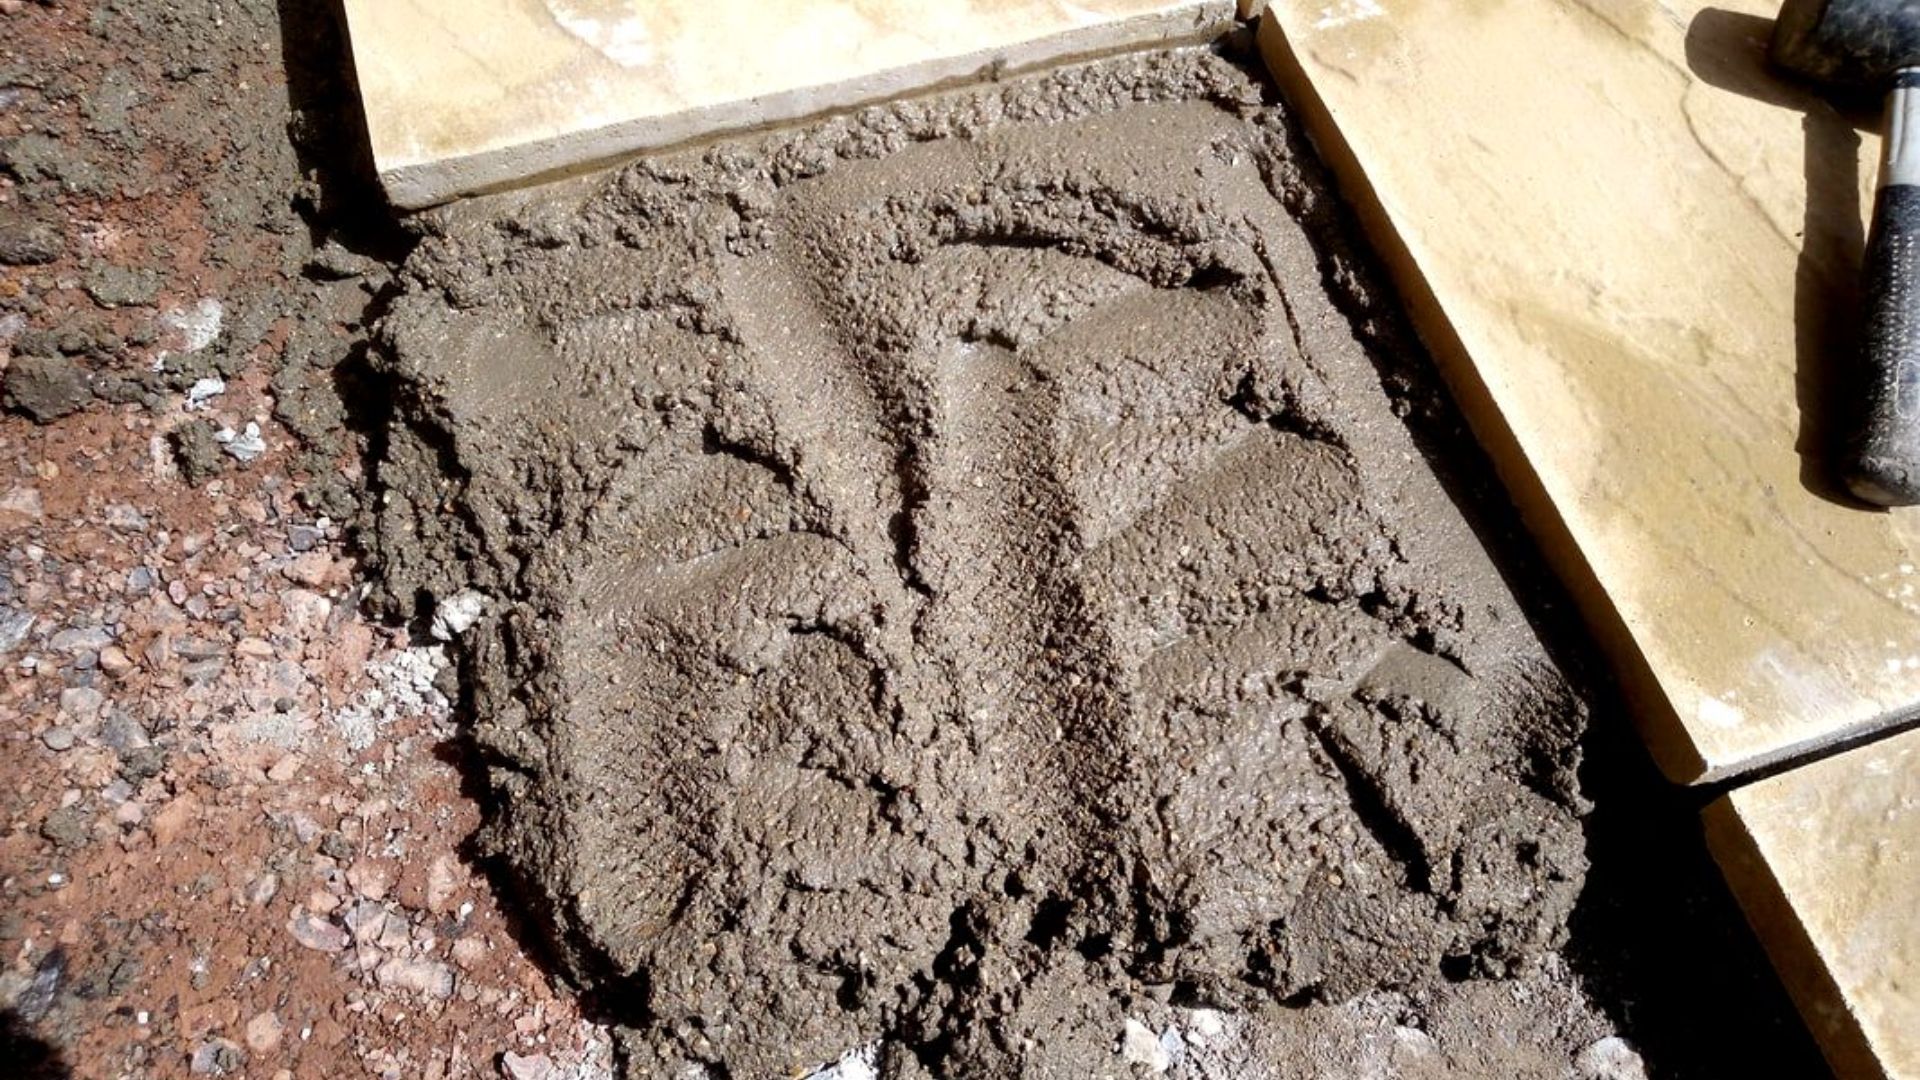
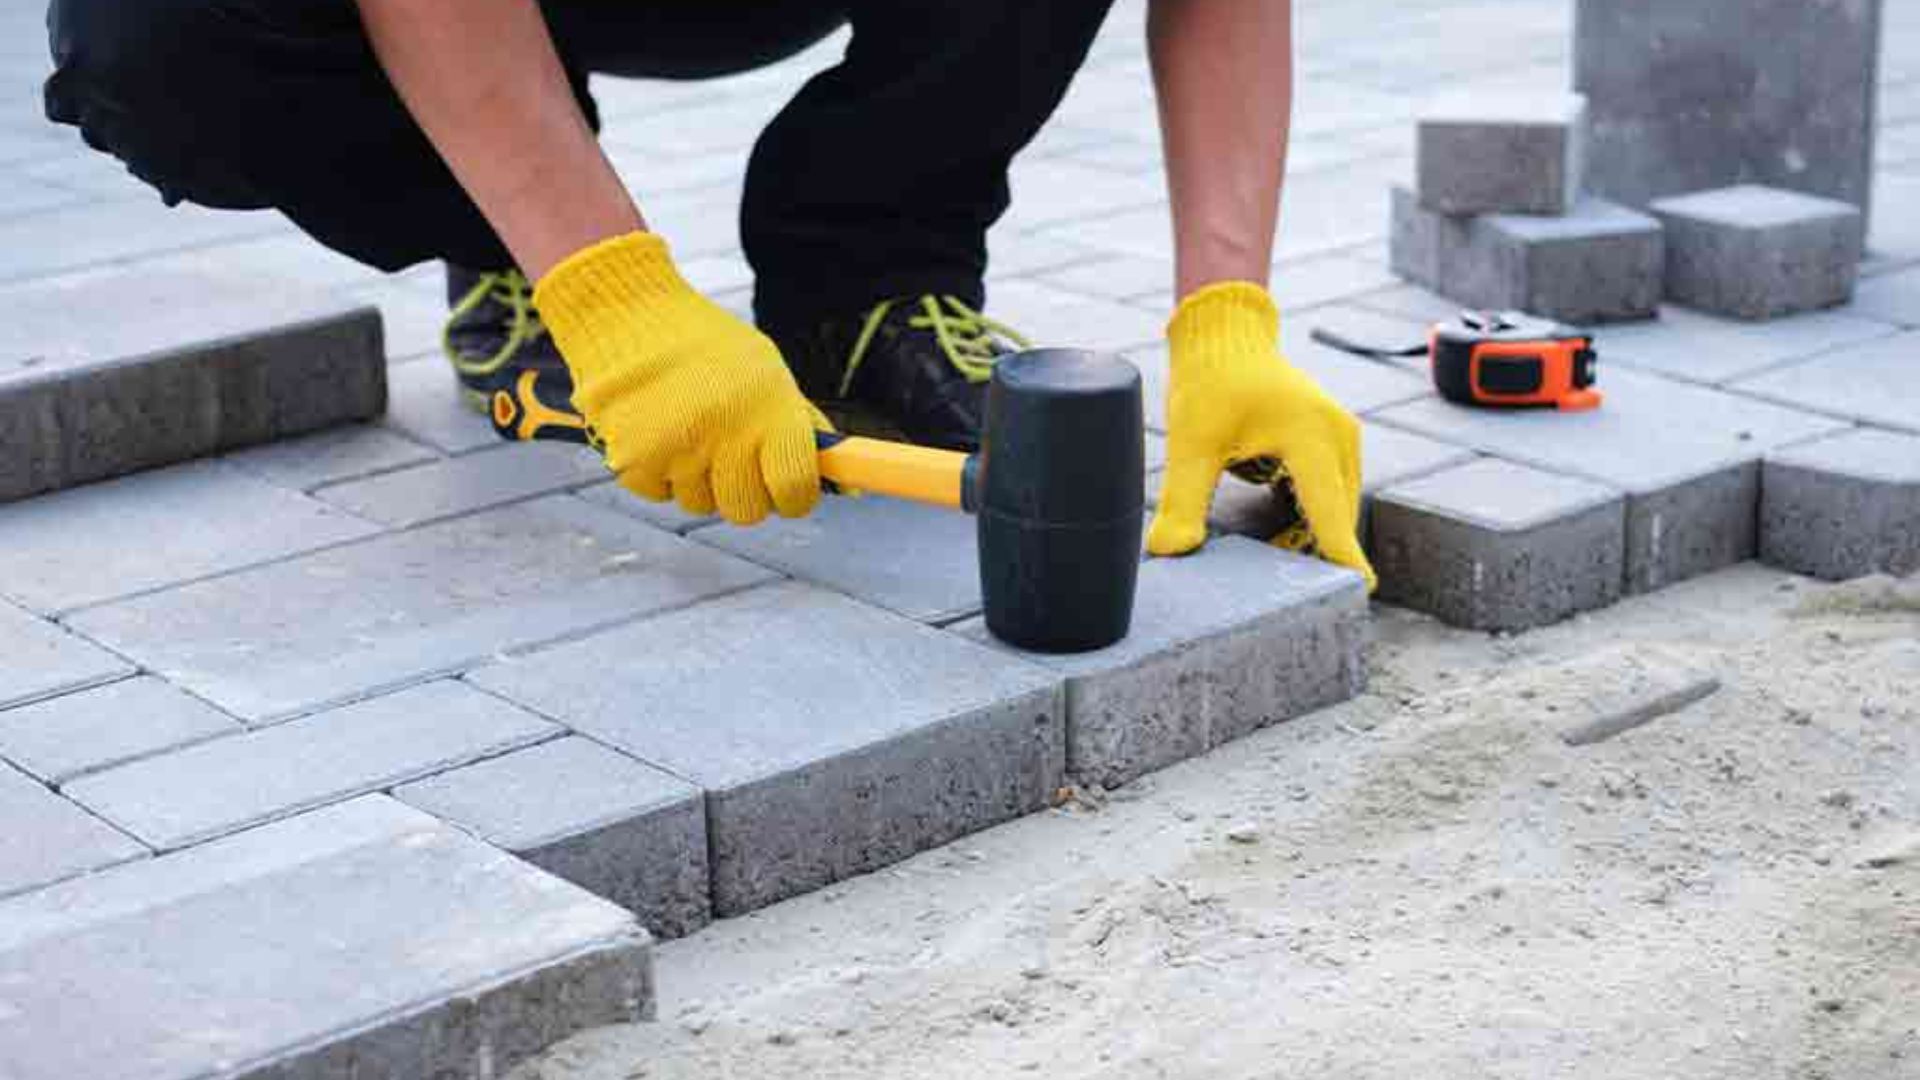
Once the concrete is poured into the mold, use a trowel to press down the mix and fill all gaps, ensuring that the corners and edges are fully packed with concrete. This is particularly important for avoiding weak spots in the slabs. After the mold is filled, lightly tap the sides to remove any trapped air bubbles, which can create surface imperfections and weaken the slab.
Frames are also useful for keeping the concrete in place, especially when pouring larger slabs directly onto the ground. A sturdy frame will help hold the shape while the concrete sets, ensuring it doesn’t spread beyond the intended area.
Curing the Slabs Properly: The Key to Durability
Proper curing is one of the most critical aspects of ensuring the longevity and durability of your concrete paving slabs. Curing refers to the process of keeping the concrete moist while it sets. This allows the concrete to achieve its full strength and prevents cracking caused by rapid drying.
Once the concrete has been poured and leveled, cover it with a plastic sheet or a curing blanket to trap moisture and prevent it from evaporating too quickly. If you’re working outdoors, ensure the covering is securely in place, especially in windy conditions. The concrete should remain covered for at least 24 hours.
During the curing process, it’s essential to check the moisture levels regularly. Lightly mist the surface with water if you notice any drying spots, but be careful not to add too much water, as this can weaken the slab. After the first day, remove the covering and mist the surface periodically for the next 5 to 7 days. This extended curing period helps ensure that the concrete slabs will be strong and resistant to cracking.
Proper curing also enhances the durability of your slabs, ensuring that they can withstand temperature changes, foot traffic, and the elements for years to come.
By following these best practices for pouring, framing, and curing concrete paving slabs, you can achieve a professional-looking finish that’s both durable and aesthetically pleasing. Whether you’re working on a small DIY project or a larger outdoor area, these steps will help you create sturdy, long-lasting concrete slabs.
Common Mistakes To Avoid When Making Concrete Paving Slabs
When creating concrete paving slabs, the quality of your materials and techniques can make or break your project. To ensure your slabs are durable and long-lasting, it’s essential to avoid common mistakes that can weaken the final product. Here are three of the most frequent errors and how to prevent them:
Adding Too Much Water
One of the most common mistakes people make when mixing concrete for paving slabs is adding too much water. While water is necessary to activate the cement and create the paste that binds everything together, excess water can significantly weaken the mixture. Concrete relies on a precise water-to-cement ratio to achieve its full strength. When you add too much water, it dilutes the mix, leading to a more porous and brittle result. This weakens the structural integrity of the slabs, making them more prone to cracking and weather-related damage.
To avoid this mistake, always follow the manufacturer’s guidelines for the water-to-cement ratio. If the mix appears too dry, resist the urge to add more water. Instead, carefully measure and adjust small amounts until the consistency is correct. A thick, moldable texture is what you’re aiming for. By using the right amount of water, you’ll ensure your concrete paving slabs are robust and can withstand heavy use and various weather conditions.
Skipping the Curing Process
Another critical step that is often neglected is the curing process. Curing is essential for concrete to reach its maximum strength. When concrete is poured and left to dry without proper curing, it dries too quickly, which leads to surface cracking, shrinkage, and a weakened slab structure. This premature drying can also cause the concrete to become brittle over time, reducing its ability to bear weight and resist environmental wear and tear.
Curing involves keeping the concrete moist after it’s poured to allow it to gain strength gradually. Ideally, you should cover the slabs with plastic sheeting or use a curing compound to seal in moisture. For the best results, the curing process should last at least seven days. Skipping or rushing this step compromises the durability of your paving slabs, so patience is key to ensuring they last for years.
Using the Wrong Type of Cement or Aggregates
The materials you choose also play a pivotal role in the strength and longevity of your paving slabs. Using the wrong type of cement or aggregates can lead to a weak, low-quality final product. For instance, opting for a general-purpose cement when a higher-strength blend is required can result in slabs that are not durable enough to withstand the elements. Similarly, choosing subpar or improper aggregates, such as overly fine sand or weak gravel, can affect the integrity of the slabs.
Aggregates provide the bulk and strength to concrete, so it’s essential to use clean, hard, and properly sized materials. A mix with the right proportions of coarse and fine aggregates ensures that the concrete is well-packed and has fewer voids. This, in turn, leads to higher durability and strength.
To avoid this common mistake, make sure you’re using high-quality materials recommended for concrete paving. Research the best cement and aggregates for your specific project, and stick to trusted suppliers. By using the right materials, you can avoid the disappointment of cracked or broken slabs after a short time.
Making concrete paving slabs is a detailed process that requires attention to quality and technique. Avoiding these common mistakes—adding too much water, skipping the curing process, and using the wrong materials—will help you create durable, long-lasting slabs. Take the time to follow the correct procedures, and you’ll be rewarded with strong, reliable paving slabs that can stand the test of time.
Enhancing The Durability Of Your Paving Slabs
Ensuring your paving slabs last for years involves taking additional steps beyond simply laying them down. With a few strategic measures, you can significantly enhance their durability and keep them looking great. In this section, we’ll explore three key techniques: reinforcement, sealing, and adding coloring agents.
Reinforcement: Strengthening Your Paving Slabs
One of the most effective ways to make your paving slabs stronger is by adding reinforcement materials like rebar or wire mesh. While concrete is a highly durable material, it can still crack under heavy loads or when exposed to shifting soil. Rebar and wire mesh act as internal support systems within the slab, helping to distribute the weight more evenly and preventing cracks from forming.
To incorporate reinforcement into your paving slabs, you’ll want to position the rebar or wire mesh within the middle of the concrete as you pour it. This gives the slab flexibility under stress, making it less likely to break. Reinforcement is especially important for areas with high traffic, like driveways or patios, where the slabs are exposed to frequent weight-bearing activity. By adding this layer of structural strength, your slabs can better withstand the elements and everyday wear and tear.
Sealing Your Slabs: Protection from Water Damage and Stains
Another critical step in enhancing the durability of your paving slabs is sealing them. Concrete is a porous material, meaning it can absorb water, oils, and other liquids over time, leading to damage or discoloration. Concrete sealants act as a protective barrier, preventing moisture from seeping in and reducing the risk of cracks caused by freezing and thawing cycles.
Sealing your slabs not only shields them from water but also makes them easier to clean. Sealants prevent stains from setting in, ensuring that spills, dirt, and grime can be wiped away without leaving a permanent mark. To apply a concrete sealant, wait until the slabs are completely dry after installation. You can choose from different types of sealants depending on your needs, whether it’s a matte finish for a natural look or a glossy one to enhance the slab’s color.
Remember to reseal your paving slabs every few years to maintain their protection. This small maintenance step can add years to their lifespan, helping them resist not only water damage but also UV rays and other environmental factors that can degrade concrete over time.
Adding Coloring Agents: Decorative Slabs That Stay Strong
If you want to add a touch of creativity to your outdoor space, consider using coloring agents in your paving slabs. Dyes and pigments can be mixed into the concrete before pouring, allowing you to customize the look of your slabs. Whether you prefer a natural stone appearance or bold, modern colors, the right mix can give your patio or pathway a unique visual appeal.
However, when adding coloring agents, it’s crucial to choose products specifically designed for concrete. Standard paints or dyes might weaken the integrity of the slab, leading to cracks or flaking. Concrete-specific pigments are formulated to mix seamlessly with the material, ensuring that the color is evenly distributed without compromising strength.
To achieve the best results, follow the manufacturer’s instructions carefully, and avoid adding too much pigment, as this can affect the curing process. Properly mixed, colored concrete can be just as durable as standard slabs, while offering the added benefit of aesthetic customization. Additionally, when sealed properly, the color will stay vibrant and resist fading, even after years of exposure to sunlight and weather.
By reinforcing your slabs, sealing them, and adding color, you not only enhance their durability but also create a long-lasting and visually appealing surface that can withstand the test of time. Whether you’re creating a functional patio or a decorative pathway, these steps will ensure your paving slabs remain sturdy and beautiful for years to come.
Eco-Friendly Concrete Mix Options For Paving Slabs
In recent years, there’s been a growing shift towards sustainable construction practices, and the use of eco-friendly concrete mixes for paving slabs is an excellent example of this trend. By incorporating sustainable materials, creating permeable concrete, and using carbon-reducing additives, builders can help reduce the environmental impact of traditional concrete, all while maintaining strength and durability. Let’s explore some of the most effective ways to make your concrete mix more eco-friendly.
Sustainable Materials
One of the simplest ways to create a more eco-friendly concrete mix is by incorporating sustainable materials. Instead of using 100% new, raw aggregates, you can substitute some of them with recycled materials like crushed glass, recycled concrete, or other industrial by-products. Using recycled aggregates reduces the demand for new natural resources, cutting down on mining and transportation emissions.
Fly ash, a by-product of coal combustion in power plants, is another excellent eco-friendly alternative. When mixed with traditional cement, fly ash can improve the strength and durability of concrete while reducing the overall carbon footprint of the project. By utilizing these recycled and waste materials, builders not only create sustainable paving slabs but also help divert waste from landfills.
Permeable Concrete
Another way to make your paving slabs more eco-friendly is by using permeable concrete. Permeable concrete, often called “pervious” or “porous” concrete, is designed to allow water to pass through the surface rather than run off into storm drains. This reduces water runoff, helps recharge groundwater, and prevents soil erosion—particularly important in urban areas where impermeable surfaces dominate.
To make permeable slabs, the mix uses less fine aggregate (sand), creating larger gaps between particles in the concrete. These gaps allow water to flow through naturally, filtering into the ground below. This eco-friendly option is not only great for water management but also for reducing the heat island effect in cities, as it allows water to evaporate and cool the surrounding area.
Carbon-Reducing Additives
Newer materials and additives are making it easier than ever to reduce the carbon footprint of concrete. One of the most promising developments in eco-friendly concrete is the use of carbon-reducing additives, which help to lower the emissions associated with concrete production. These additives can either directly reduce the amount of carbon emitted during the production of cement or capture carbon from the atmosphere to be incorporated into the concrete itself.
For instance, some companies are now producing carbon-cured concrete, where CO2 is injected into the wet concrete mix, making it stronger and more durable while locking in the carbon. This method not only reduces the overall carbon footprint of the concrete but also enhances its structural performance. Additionally, materials like ground granulated blast-furnace slag (GGBS) and silica fume, both by-products of industrial processes, can be used as partial replacements for traditional cement, further lowering the carbon emissions of concrete production.
By embracing eco-friendly concrete mix options, you can reduce the environmental impact of your paving projects while still creating durable, long-lasting slabs. Sustainable materials like recycled aggregates and fly ash, permeable concrete for better water management, and carbon-reducing additives are just a few of the many ways you can create more sustainable construction projects. These solutions not only help minimize resource consumption but also contribute to a greener, more sustainable future.
Pre-Mixed Concrete Vs. DIY Concrete: Which Is Better For Paving Slabs?
When it comes to choosing between pre-mixed concrete and mixing your own concrete for paving slabs, there are several factors to consider, from convenience to cost. The right choice will largely depend on the scope of your project, the level of control you want over the mix, and the time you have available. Below, we’ll dive into the benefits of each option to help you decide which is the best fit for your paving slab project.
Benefits of Using Pre-Mixed Concrete
Opting for pre-mixed concrete is a popular choice, especially for homeowners looking for a convenient and efficient way to lay paving slabs. Here are some of the key benefits:
1. Convenience: Pre-mixed concrete is ready to use straight out of the bag, saving you the hassle of measuring and mixing the raw materials yourself. All you need to do is add water, and you’re ready to go. This convenience is especially useful if you’re working on a tight schedule or don’t have experience with concrete mixing.
2. Consistency: One of the major advantages of pre-mixed concrete is the consistency it provides. When you use pre-mixed, you know that the ratio of cement, sand, and gravel is perfectly balanced, which ensures uniform strength across all your paving slabs. This reduces the chances of weak spots or cracks forming in your slabs later on.
3. Time-Saving: Pre-mixed concrete is a time-saver, particularly for smaller projects. By eliminating the need to gather and measure individual materials, you can significantly cut down on the prep time. If you’re a DIY enthusiast with limited time to spare, pre-mixed concrete allows you to focus on the actual paving rather than the preparation.
Pros of Mixing Your Own Concrete
On the other hand, mixing your own concrete offers benefits that appeal to those who want more control over their project. Here’s why some people choose this option:
1. More Control Over the Mix: When you mix your own concrete, you have full control over the proportions of cement, sand, and aggregate, allowing you to tailor the mix to suit the specific needs of your project. For example, if you need extra durability for high-traffic areas, you can adjust the mix to include more cement for added strength.
2. Cost Savings: Mixing your own concrete can be more cost-effective, particularly for larger projects. Bulk purchases of cement, sand, and gravel often come at a lower cost than pre-mixed bags. If you’re working on a large patio or driveway, mixing your own concrete could result in significant savings.
3. Customization: DIY concrete mixing allows for greater customization, which can be ideal for more specialized projects. Whether you want to add coloring agents for a decorative finish or modify the texture for better traction, mixing your own concrete gives you the flexibility to make these changes.
When to Choose One Over the Other
So, which option is better for your paving slabs – pre-mixed concrete or DIY? It largely depends on the scope of your project, your experience level, and your budget.
- Choose Pre-Mixed Concrete if you’re working on a small to medium-sized project, such as a garden path or a few stepping stones. The convenience and consistency make it ideal for those who don’t have experience mixing concrete or those who are pressed for time. Pre-mixed is also perfect for projects where uniformity in strength and appearance is critical, ensuring that each slab comes out evenly.
- Choose DIY Concrete if you’re tackling a large-scale project like a patio, driveway, or retaining wall. The cost savings of mixing your own concrete become more apparent with bigger projects, where bulk material purchases can lower your overall expenses. DIY mixing is also a great option if you want to customize the mix for added strength or aesthetics.
Both pre-mixed and DIY concrete have their own advantages, and the best choice will depend on the specifics of your project. Pre-mixed concrete offers convenience and reliability, while DIY concrete provides control and cost savings. Consider the size, complexity, and your personal preferences to determine which option will give you the best results for your paving slabs.
FAQs: About Best Concrete Mix For Making Paving Slabs
What is the best concrete mix ratio for paving slabs?
The best concrete mix ratio for most paving slabs is 1 part cement, 2 parts sand, and 4 parts gravel (1:2:4). This mix provides a good balance between strength and ease of use, making it suitable for most DIY projects. For more demanding areas like driveways, a stronger mix of 1:1.5:3 may be better.
Can I use pre-mixed concrete for paving slabs?
Yes, pre-mixed concrete is a convenient option for making paving slabs, especially for smaller projects or if you want to save time. It ensures consistency and can be a great alternative if you don’t want to manually mix the materials. However, mixing your own concrete offers more flexibility and control.
How thick should concrete paving slabs be?
Concrete paving slabs should typically be between 2 to 3 inches thick for pathways and patios. For heavier load-bearing areas like driveways, slabs should be at least 4 inches thick to ensure adequate strength and durability.
How long does it take for concrete paving slabs to cure?
Concrete paving slabs usually take about 24 to 48 hours to set enough for light foot traffic, but they require a full curing period of 28 days to reach maximum strength. During this time, it’s essential to keep the slabs moist and avoid placing heavy objects on them.
Do I need to reinforce my concrete paving slabs?
Reinforcing your concrete slabs with rebar or wire mesh can significantly improve their strength and prevent cracking, especially for larger slabs or areas exposed to heavy traffic. For small DIY projects like garden paths, reinforcement may not be necessary, but it’s recommended for driveways.
What happens if I add too much water to the concrete mix?
Adding too much water weakens the concrete, reducing its strength and making it more prone to cracking. The mix should be workable but not overly runny. Always follow recommended water-cement ratios for the best results.
Can I color concrete for paving slabs?
Yes, you can add pigments or dyes to the concrete mix to create colored paving slabs. Make sure to use high-quality coloring agents designed for concrete to ensure that the color is durable and UV-resistant. Keep in mind that adding color may slightly alter the mix’s strength.
What type of cement is best for making paving slabs?
Portland cement is the most commonly used type of cement for making paving slabs. It provides excellent strength and durability for outdoor use. You can also use high-strength or rapid-setting cements depending on the requirements of your project.
Should I seal my concrete paving slabs?
Sealing concrete paving slabs is recommended to protect them from moisture, stains, and weather-related damage. A good quality concrete sealer can extend the lifespan of your slabs and keep them looking fresh. Apply the sealer after the slabs have fully cured.
How can I make my paving slabs more eco-friendly?
To make your concrete paving slabs more eco-friendly, you can use recycled aggregates, fly ash, or slag cement in your mix. These materials reduce the environmental impact of concrete production. Additionally, consider using permeable concrete mixes that allow water to pass through, reducing surface runoff.
Conclusion
In conclusion, selecting the right concrete mix for making paving slabs is essential to ensure durability, longevity, and a professional finish. Whether you’re working on a garden path, patio, or driveway, choosing the proper mix and following best practices will make a noticeable difference in the outcome of your project. Experimenting with different mixes, such as standard, high-strength, or decorative concrete, can help you find what works best for your specific needs. Don’t be afraid to adapt the methods shared here to suit your project, and remember that attention to detail is key. We encourage you to share your experiences in the comments below and let us know if there are any other concrete tips or topics you’d like to learn more about! Your insights can help others tackle their paving projects with confidence.
About the Author:
Mike Veail is a recognized digital marketing expert with over 6 years of experience in helping tradespeople and small businesses thrive online. A former quantity surveyor, Mike combines deep industry knowledge with hands-on expertise in SEO and Google Ads. His marketing strategies are tailored to the specific needs of the trades sector, helping businesses increase visibility and generate more leads through proven, ethical methods.
Mike has successfully partnered with numerous companies, establishing a track record of delivering measurable results. His work has been featured across various platforms that showcase his expertise in lead generation and online marketing for the trades sector.
Learn more about Mike's experience and services at https://theleadguy.online or follow him on social media: